
Shipping orders from Marketplaces has never been quicker! With ShippyPro you can ship hundreds of orders from your online stores, in just a few clicks!
💡Note: Please be sure that you have connected at least one Marketplace and one Carrier before you start shipping your orders.
Summary:
If you'd like to test how to ship orders, you can do it by connecting Generic as a carrier. Generic is not a real carrier, but the shipments created will be deducted from your plan.
Using the New Experience?
The New Experience may differ in some details.
Learn more in the article related to the New Experience.
1. How to ship more orders
Shipping more orders at the same time has never been easier. ✨
Your orders will be automatically imported from your marketplaces in Label Creator > To Ship.
For each order, ShippyPro recovers all details e.g. customer address, order value, cash on delivery, items details, product images and SKUs.
If you'd like to ship all orders simultaneously, take a look here:
Filter your Orders
You may like to filter your orders before shipping them.
With ShippyPro, you can filter by specific region, range of price and by keywords from the search bar.
If you'd like to filter by more than a keyword, click Multi Search and you'll see a ➕ sign appearing inside the search bar.
-Apr-15-2024-09-11-30-9441-AM.gif)
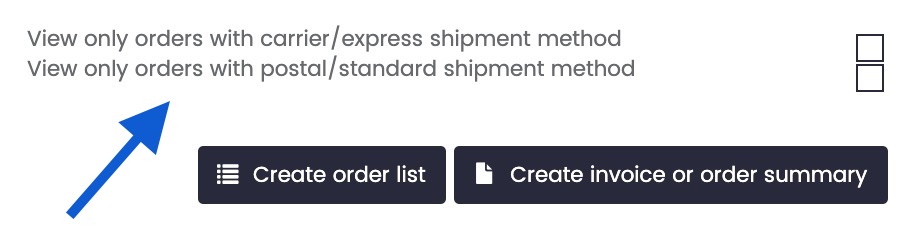
If you connect with Amazon and Ebay, you'll view these two additional filters:
Select and Ship your orders
Now flag all the orders you'd like to ship.
You can either click them singularly or you can ship them all by clicking the box near ORDER ID.
Then, click on Create shipment for # Orders to start shipping you orders.
-1.gif)
Edit Parcel Dimensions
Among the other steps for shipment creation, you can also edit Parcel Dimensions.
You'll find predefined dimensions that can easily be customized from Admin > My Addresses and Parcels. This could be useful, for example, if your products have standard dimensions.
If your parcel has different dimensions, click on the ➕ sign on the top left to edit them.
Select the amount of parcels that your shipment contains and then select the Click here to add a parcel:
-1.gif?width=466&name=ezgif_com-video-to-gif%2B(18)-1.gif)
International shipments
In case of International shipments, you'll also see a table for Items Description:
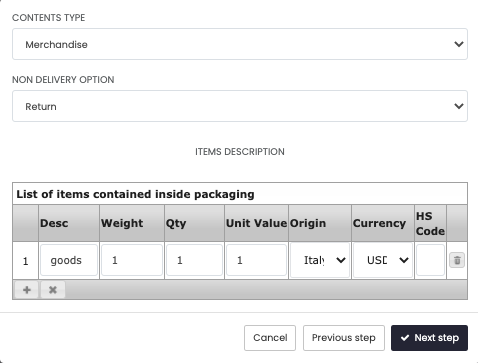
This step is mandatory: in case of orders coming from a Marketplace the fields will automatically be filled with the required information directly retrieved from the order.
💡 What's the HS Code? The HS Code is the Harmonized Code referring to the specific product that you're shipping, check here what's your HS Code.
ShippyPro can automatically import the HS Code from Shopify with every annual plan subscription, so that you don't have to include it every time.
Discover here all you need to know about International Shipments by creating customs documents, specify the Incoterms and attach Paperless Documentation:
Choose then the Carriers you wish to include in the Shipping Rate Calculator and then click on Next Step to proceed!
Compare Carriers Rates
ShippyPro automatically compares shipping rates of all your carriers and chooses the best option for you, showing the economic prices first.
The best price is already selected, so you don't have to do it for every order. However, you can still change if you want to.
Lastly, click on Send.
-1.gif?width=500&name=ezgif_com-video-to-gif%2B(19)-1.gif)
To speed up this process even more you can decide to apply Shipping Rules or Carrier Rules
2. How to ship one order at a time
Shipping a single order is super simple! Let's take a look! 🔎
As you already know, your orders will be automatically imported from your marketplaces in Label Creator > To Ship.
To Ship one order at a time click on Create Shipment on the right side of the page:
Recipient Info
To complete the fields with Recipient Info you can either add the address manually or retrieve it from your Address Book. Click on Next step to move to Parcel details.
Name, Streetline, City, Post Code, and Phone are mandatory fields.
📌 To remove Customer's Data check you can go to My Profile > Preferences and disable Check order data when shipping orders option from Carriers Preferences.
Edit Parcel Dimensions
As well as for Multiple Shipments, with a Single Shipment you can edit Parcel Dimensions.
You can follow the same steps for both types of Shipments.
International Shipments
Even in this case you'll need to follow our International Shipments guidelines.
Shipping Rate Calculator
ShippyPro automatically compares shipping rates of all your carriers and chooses the best option for you, showing the economic prices first.
You can add some Carrier Options by clicking on the ➕ sign.
With some carriers, you can also hover your mouse over Carrier Price to see a little recap, instead.
Choose the option that suits you best and then click on Send.
-Apr-15-2024-09-11-38-2235-AM.gif?width=500&name=ezgif_com-gif-maker%2B(1)-Apr-15-2024-09-11-38-2235-AM.gif)
In a few minutes, labels will be ready to be printed inside Shipping Labels section.
3. How to print labels
In a few minutes, labels will be ready to be printed from Label Creator > Shipping Labels.
Want to know how to print your first Shipping Label? Click down below to read our step by step guides: