How ShippyPro API works and how to integrate them
Here is a simple guide to help you with the integration of ShippyPro APIs.
ShippyPro API is the easiest way to integrate your system with 155+ Carriers worldwide to ship your packages.
Summary:
- Before you start
- ShippyPro API
- How can I test the ShippyPro API?
- How API Fields Validation works
- Errors & Troubleshooting
1. Before you start
To start using ShippyPro API, you should first:
-
Create a ShippyPro Account by clicking here. If you'd like to know how to create an account step by step, click here.
-
Connect your Carriers Account from Carriers > Connection and complete the Carrier setup. For more details, please read this article here.
-
After setting up your ShippyPro profile, read our API-Documentation carefully. You'll find all the information you need in order to use our API there.
- Contact sales@shippypro.com for the activation of this section and information about the costs. APIs can only be activated with an Enterprise plan.
-
You can decide to activate an API Orders Folder and easily manage your API Orders directly from the platform, discover how to do it here.
You can add more than one API Key directly from your ShippyPro profile. Follow these simple steps:
-
Click on Integration > API
-
Click on Add API and the API key will form automatically.
-
API type
You can choose the functionalities for your API keys from this drop-down menu

Full Access: the API key can be used for all the API functionalities (shipments, rates retrieval, access to the Ship&Collect maps, etc.)
Maps: the API key can only be used to show the PUDO map for Ship&Collect functionalities
PII Excluded : all the Personal Information will be obscured by this key (Names, addresses, phone numbers, etc.)
2. ShippyPro API
Using our API solution, you can get all your systems (like OMS, WMS, POS, ERP and many others) to communicate with your Carriers using a simple API integration.
Our API is written in 14 programming languages and in two different technologies, REST and SOAP.
Any API call has its own method: as per the latest updates, we currently only accept POST method.
You'll find your API Key by clicking on Integrations > API.

Once you copied your API Key, follow the steps explained here: API Documentation > Authentication.
In case you obtain the error "API Key cannot access PII methods", you should create a new API key from scratch and perform calls with the newly created one.
Please remember to set the API Call as follows:
-
API KEY as Username
-
Leave the Password blank
How many API calls can I make simultaneously?
With ShippyPro you can make up to a maximum of 20 API calls every 10 seconds.
This means that you can do 10 API calls in one second but then you will only have 10 remaining API calls for the next nine.
When request submissions exceed this limit, API will return the following error: Error: 429 Too Many Requests.
Alternatively, we suggest you use different IP addresses and apply a load balancer logic in order to overcome this limit.
If you want to increase this limit, kindly contact sales@shippypro.com for a quotation.
From Integrations > API, click on View API logs to see live requests and responses in more detail.

API (Request + Response) are in Json format
3. How can I test the ShippyPro API?
You can test our API using API Console or an External Software that supports API calls.
How does API Console work?
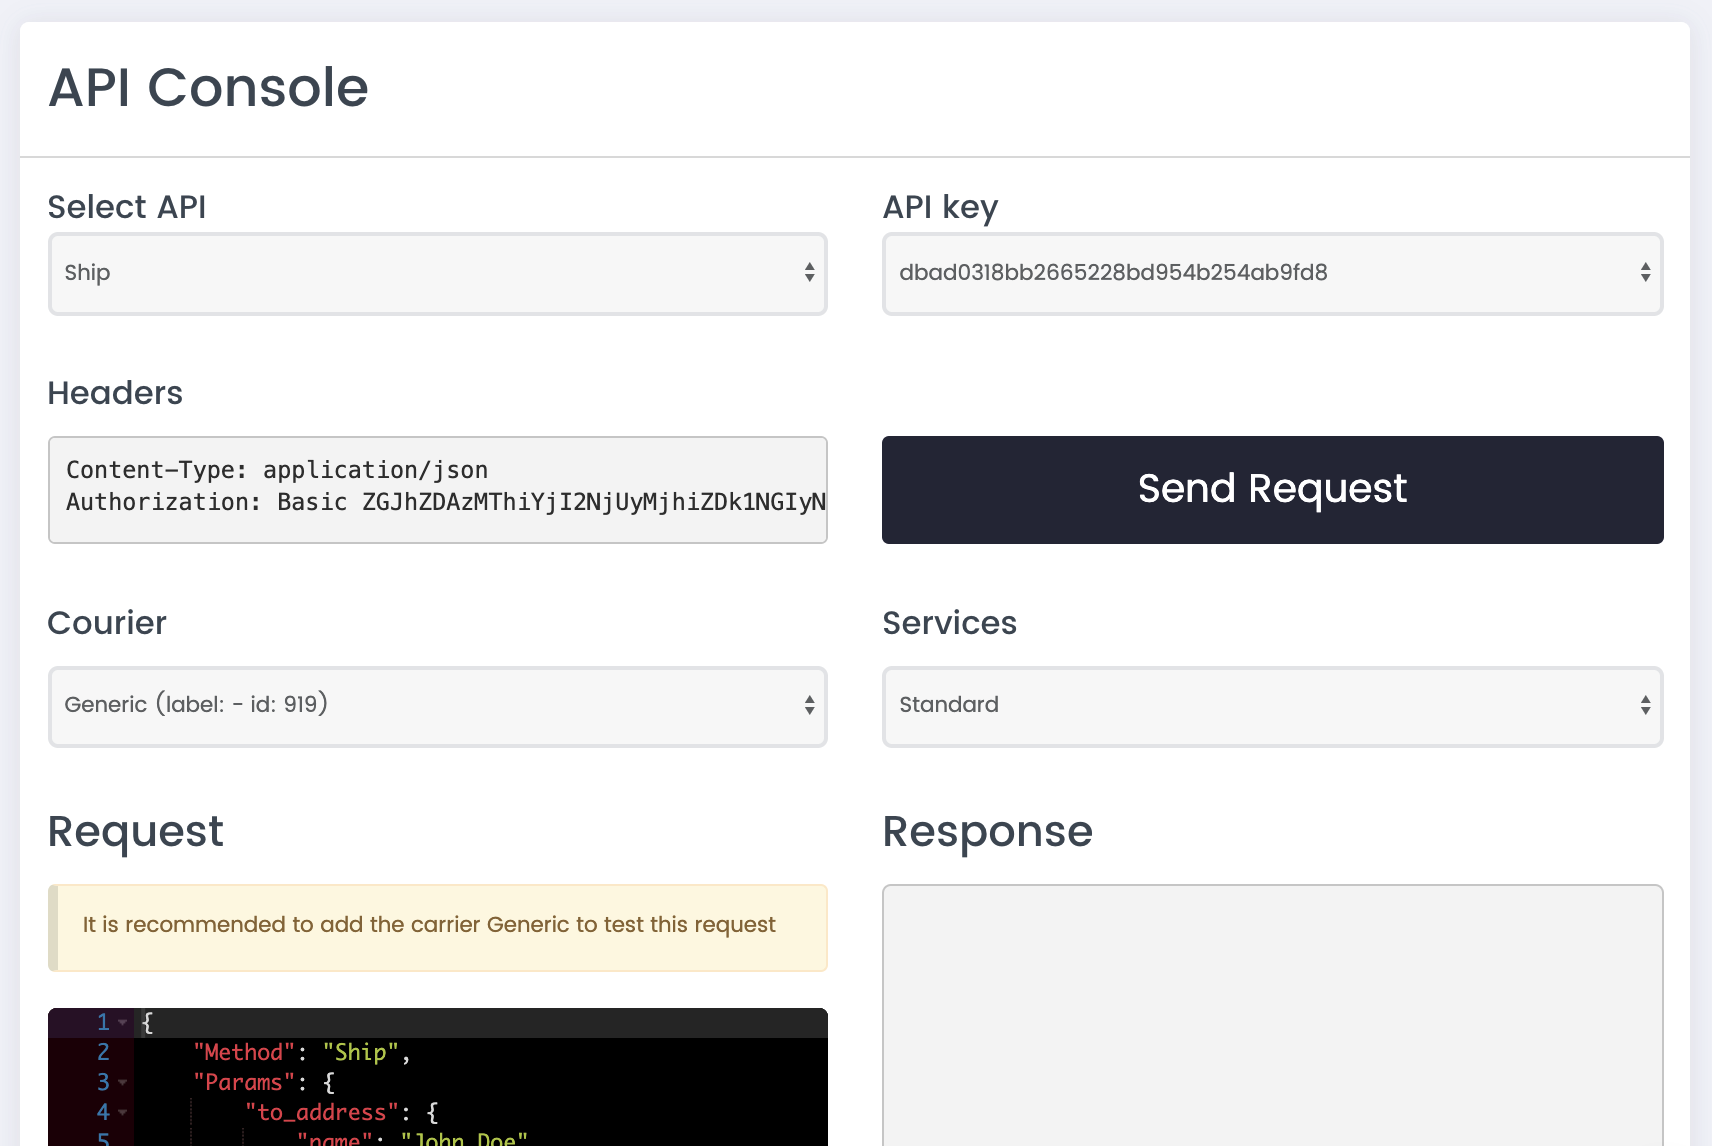
You can test our API Calls from Integrations & API > API. Click on the right top button Use the API Console.
-Apr-15-2024-09-11-06-3084-AM.png)
You'll get access to ShippyPro API Console, where you can test all our API Calls:

Remember that Shipping and Edit Calls will generate REAL shipping labels that will be counted as part of the shipments provided each month with your current Plan. We suggest you to use Generic Carrier to test these calls.
Generic is not a real carrier, it won't generate any real tracking number, but it allows you to test our main functions. Learn how to use it here: How to use a Generic Carrier.
📌If you'd like to use an API call that is not included among the ones listed in the API Console you should employ a different software like Postman or Insomnia.
So what is actually counted as a proper API Call?
In short, only Shipments generated through Ship call will be counted, and therefore only the ones correctly generated. Those which faced Error won't be included.
Get Rates call simply show Prices and Options for the shipment, for this reason it doesn't concern shipment count.
Moreover, orders with Error won't be counted as a proper shipment.
4. How API Fields Validation works
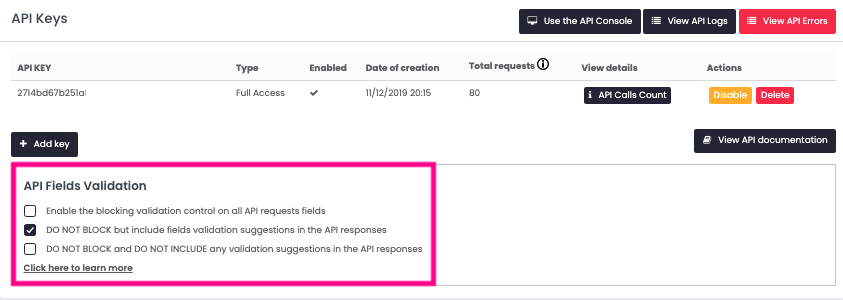
You can decide to apply the best API Fields validation option you prefer at every moment from ShippyPro account > Integrations > API.

You can choose between three different options available, let's take a look at them!
-
Enable the blocking validation control on all API requests fields: If you wish to prevent the API call from being sent in case of missing data or an invalid API, you can select this option to block the generation of the call. This will result in an error in the request.
-
DO NOT BLOCK but include fields validation suggestions in the API responses: API call will still be sent, accompanied by helpful hints to identify any errors encountered.
-
DO NOT BLOCK and DO NOT INCLUDE any validation suggestions in the API responses: allows you not to block the call and don't display any suggestion for the error
📌 Kindly note that if you use our API Console you won't be able to edit the scheme of each call and the predefined validation would be the hard one.
📌 If you don't want the shipment to go through despite validation errors, just enable the option Enable the blocking validation control on all API requests fields. This way you won't generate empty labels in the response.
5. Errors & Troubleshooting
Go to this link to check the most common errors & resolutions about API:
How to fix API errors