In Orders> Ready To Ship, you'll find all the orders that are automatically imported from your Marketplaces.
From this page, you can mainly Ship your orders, Edit or Delete them.
Keep reading to discover what else you can do!
Summary
1. How to ship a single order
With ShippyPro, you can easily manage all your orders before shipping them.
Shipping an order is super simple! Let's take a look! 🔎
-
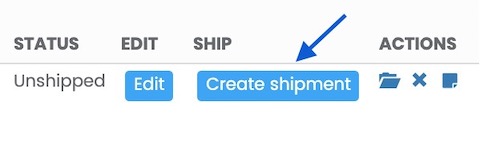
You can Ship one order by clicking on Create Shipment on the right side of the page:
Click here to learn how to Create Shipments in detail: How to Create Shipments
Note: once you ship an order, a shipping label will be automatically created.
-
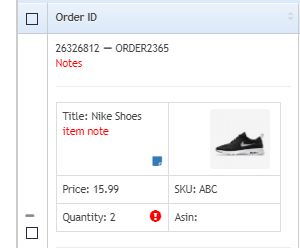
If you'd like to see Order Details, click on this ➕ sign on its left:
-Apr-15-2024-08-56-40-3401-AM.gif)
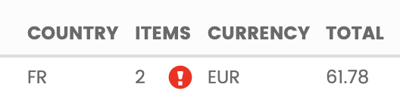
- If you see a red exclamation mark❗️under the column Items in Orders> Ready To Ship, it means that the order contains two or more products.
-
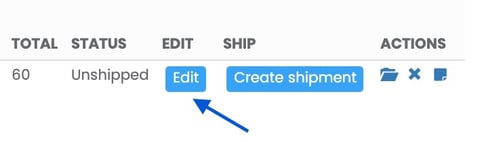
By clicking on Edit, you can review some order information, like Recipient Address or Item Description.
-
If you'd like to Archive your order, click on the folder icon under Actions.
-
You can also Delete your orders by clicking on the✖️ Icon.
Please note that this will permanently delete the order and you will not be able to retrieve it again or import it again.
If you edit the order on your store and you'd like to import the updated version of it, you should click on the✖️ and wait for a new sync (every 10 minutes).
Some Sales Channels won’t be importing again your orders once cancelled, some examples are:
-
Shopify
-
Amazon
-
To add a Note to your order, click on the Notepad icon:
-4.gif)
2. How to ship more orders
With ShippyPro, you can spare time creating shipments, merging or deleting two or more orders at one time.
Want to know how to ship more orders at a time? Read this article.
You can only merge two orders at a time. If you'd like to undo the merging, you need to delete the order and then wait 10 minutes for the dashboard to refresh.
-Apr-15-2024-08-56-30-3884-AM.gif)
3. How to upload orders manually
If you need to upload orders manually you can easily do it by importing an Excel/ CSV/ TXT.
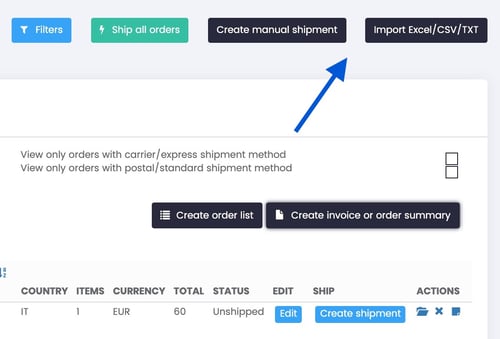
Create Manual Shipment
You may also like to Create Shipments for orders that you receive outside your Marketplace.
You can do it by clicking on Create Manual Shipments and adding the recipient and sender information. You can use this feature to Create Returns of your orders as well.
In order to do so, follow these guidelines: How to create a Manual Shipment
4. Create Order List, Invoice or Order Summary
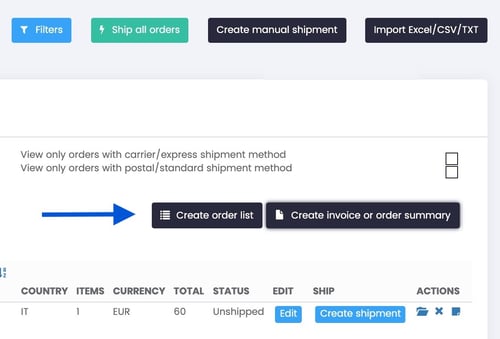
-
From this section, you can create a recap of all your orders waiting to be shipped by clicking on Create an Order List.
-
If you'd like to include more details and Create an Invoice, click on Create invoice or order summary.
5. What do background colors of the orders mean?
You may have wondered why your orders sometimes appear with Yellow, Blue or Red background, here's what they mean:
-
Yellow: the order has a note.

-
Blue: the order is in Pending Payment status (waiting for COD or bank transfer payment).
Note: The value of Cash On Delivery is automatically imported from your sales channels.

-
Red: the order has been moved back in To Ship after encountering error in Shipping Labels section.

6. Errors & Troubleshooting
How can I look for a specific order?
Then try to look for the order you were interested in by using our search bar on the top of the page or CTRL + F from Windows and Command + F on Mac.
You can search your orders by entering:
-
Customer name
-
Date
-
Order ID / Transaction ID
-
SKU
Why can't I delete my old Marketplace connection?
Even if you delete a Marketplace connection, you may still see it in the Ready To Ship section: if this occurs, please wait 10 minutes, clear your browser’s cache and try logging into your ShippyPro profile again.
Important: in case you have ever imported orders from an Excel file, the Excel tab will not disappear, even if no further orders are imported with this method.
Why is the ShippyPro logo spinning when I try to ship my parcel?
In case the rates keep on loading and not displaying, try deleting any special characters in the order (e.g. item description, notes, etc.).
You can also check if your item description contains the string file (...) - e.g. "nail file (1x) - or similar. In that case, make sure to modify it by deleting either the word "file" or the brackets.
Since the description has the combination file (...), the XSS thinks this is a malicious XSS function and stops the code, it's the standard PHP check.
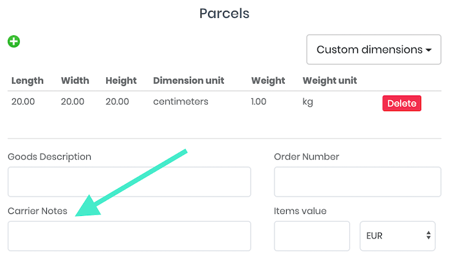
How can I send a note to the Carrier?
Orders' notes are not automatically attached to the shipment.
For this reason, if you'd like to make it arrive to the Carrier you'll need to add it in Carrier's note field during the creation of the shipment.
Once included the information, the note will be transmitted to the carrier together with shipment information.
Notes attached to the shipment, as well as Items notes, will be displayed on the order forever. This way you'll be able to seeing them even if the order will move from to ship to Shipping labels.
Why don't I see the notes on the printed label?
Not all carriers support notes, and some don't have the capability to print them on the label. Always check with your contact person whether or not they are supported.
If your courier does not support notes, take a look at our Label Design functionality! You may decide, for example, to insert additional text directly on the label (N.B: the note will not be sent to the courier but will be visible at the bottom of the label).
** functionality only available for API shipments and only for configured couriers.
Why can't I see my Carriers during Shipment Creation?
Are you trying to create your Shipment but you can't display the Carrier you'd like to use?
By clicking on Excluded Carriers you'll be able to see why you Carrier have been hidden.
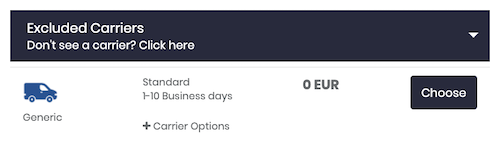
One of the most common causes is, for example, missing ZIP Code for the Country of destination of the Shipment, in that case you can easily add it by following the steps from Point 2 of this guide.
How can I add Insurance to my Shipments?
Add an Insurance to your Shipments has never been quicker.
You can easily add it during your Shipment Creation, let's see how!
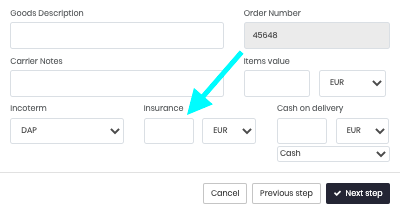
Add your shipment's info and reach this step:
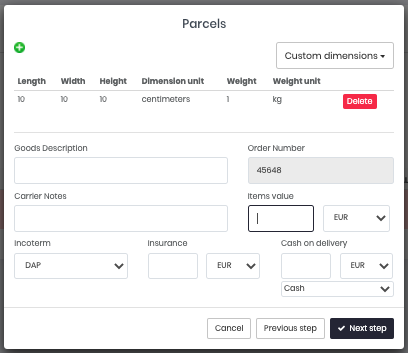
You'll see the dedicated Insurance field on the bottom, add there the value to apply.
Then proceed with your shipment creation as usual, your order will present shield icon over the Carrier to recognize it as insured.

If you forgot to add Insurance during Shipment Creation, don't worry!
You can always include it after the label creation by clicking on the blue pencil icon and writing the value in the Insurance field:

If you are creating your shipment via API, remember that the insurance is per shipment, not per package! The only exception is with UPS shipments, in which case we take the insurance value and divide it by the number of packages.
How can I notify Dangerous Materials for my shipments?
According to your Carrier there are some different measures to follow in order to notify the presence of Dangerous Materials for your shipments.
Let's see the right configuration to do so!
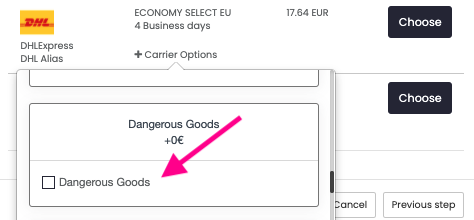
As a general setup, you'll be able to select Dangerous Materials option directly from your Carriers Options while creating the shipment:
Take a look at the examples below in order to correctly add it inside your Shipping API call based on your Carrier:
Fedex:
"fedexdangerousgoods": {
"label": "Dangerous Goods",
"parameters": {
"fedexdangerousgoods": "1"
For UPS you need to add upshazardousgoods line.
For DHL instead, add dhlexpressdangerousgoods.
Spring XBS:
{
"CarrierOptions": [
{
"name": "springxbsdangerousgoods",
"value": "1"
}
]
}
Asendia:
{
"CarrierOptions": [
{
"name": "asendiaeuropedangerousgoods",
"value": "1"
}
]
}
How can I duplicate an order with the same shipping data?
During your daily agenda you may require to duplicate an order already shipped.
First of all, click on Create manual shipment from Shipping > Ready To Ship section.
-Apr-15-2024-08-56-25-6945-AM.gif)
You'll see a search bar on the top right of the menu, paste there your Marketplace or ShippyPro ID number.
-4.gif?width=500&height=235&name=ezgif_com-video-to-gif+(4)-4.gif)
At this point, in case you shipped multiple times to the same recipient, it will automatically be assigned the last order, open the drop-down menu to choose between the other ones.
Then proceed with the next steps as usual to create your shipment.
Why my Orders page is so slow or tends to crash?
If your Order page is currently running slow or it tends to crash or freeze, here are some possible solutions that may help you make your Order section faster than ever.
- Archive your orders
If in Order page are collected too many orders from the past months (or even years), we suggest you to archive those orders which won't be shipped anymore in order to lighten the weight of the page. Take a look here to discover how to archive orders. - Hide items images
Another way to proceed would be to hide products images, which inevitably slow down the page load.
Disable Show article's details with images in the Order page from My Profile > Preferences to set it. - Update your orders as Completed
Try to set orders as Completed directly on the Marketplace, so that cancelling them from Order page they won't be imported again.
In addition, here are some possible reasons why your To Ship page might unexpectedly crash or freeze
Usually, the issues come out when your PC runs out of memory for the running applications.
For example, some browsers such as Google Chrome consume more memory, and it tends to get worse when several tabs are simultaneously open in the browser.
In case your page keeps getting unresponsive, you can:
-
monitor the RAM usage from the Windows Task manager: CTRL-ALT-CANC → Task Manager → Processes tab → RAM Usage, and check the situation while on that page
-
try to run the browser with fewer tabs opened
-
try on another PC and check if the same problem occurs
You can also follow these useful tips as well 💡
-
update the browser to the latest version
-
disable browser extensions you don't use
-
frequently clear cache
-
check for other applications that can affect memory usage and make sure to close them
Error: Invalid Input inserted for parameter 'shippypro' while perfoming the following action: OrderShip
This error is related to special characters found in the order data and notes. For security reasons, these characters are not accepted, which is why orders cannot be processed.
We recommend checking the notes field and shipment data for the presence of special characters.
Invalid input please check your data again
Check the address and order details and remove any special characters. For security reasons, these characters are not accepted, which is why orders cannot be processed.
Field must be a positive number
If you encounter this error when creating the shipment, try increasing the value of any fields that have a value of 0 (e.g. item value in CN22)