This legacy version will soon be discontinued. To activate the new version, click the toggle in the top left:

If you are already using the new interface, we invite you to check this article.
Creating and managing your Invoices and Order Summaries is really simple.
Including an Invoice inside the package is mandatory when dealing with international shipment and for custom clearance.
Having an Order Summary could be useful to better organize your picking process, instead.
Let's see how it works! 🔎
Summary
1. How to create an invoice
You can generate Invoices or Order Summaries from Label Creator > To Ship and also from Label Creator > Shipping Labels. This means that you can create this kind of documents before or after shipping your orders.
💡 Note: Please note that if you create your invoice before shipping your orders (from Label Creator > To Ship), certain data as Tracking Number, won't be included inside the Excel that you can create from Label Creator > Invoice Manager.
You can either select and create your shipping document for one order or multiple orders at one time.
We recommend creating up to 100 documents at a time to ensure optimal performance.
📌 Since the Order Summary, as well as the Invoice, needs articles details from the item to be included, it works only with orders coming from a Marketplace.
-
From To Ship, click on Create Invoice or Order Summary on the right side of the page:
-1.gif?width=400&height=156&name=ezgif_com-video-to-gif+(38)-1.gif)
-
From Shipping Labels, click on Actions > Create Invoice or Order Summary.
-1.gif?width=400&height=231&name=ezgif_com-video-to-gif+(37)-1.gif)
-
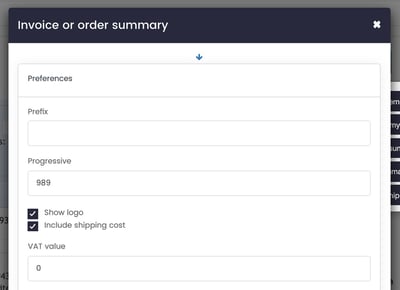
The window that pops up is the same in both pages and automatically filled with Order Data. However, you'll be able to edit your Invoice and Order Details.
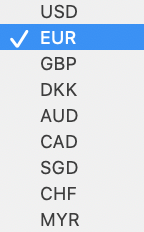
As well as the Currency to employ:
-
By filling Description, Quantity and Unit Price fields, you'll be able to add multiple items to your Invoice
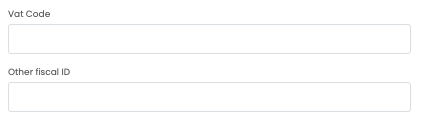
📌 Please note that we do not import fiscal information of your customers, for this reason you'd need to add the VAT number manually.
-
After editing all your information, decide whether you'd like to create an Invoice or an Order Summary:
-1.gif?width=400&height=125&name=ezgif_com-video-to-gif+(39)-1.gif)
-
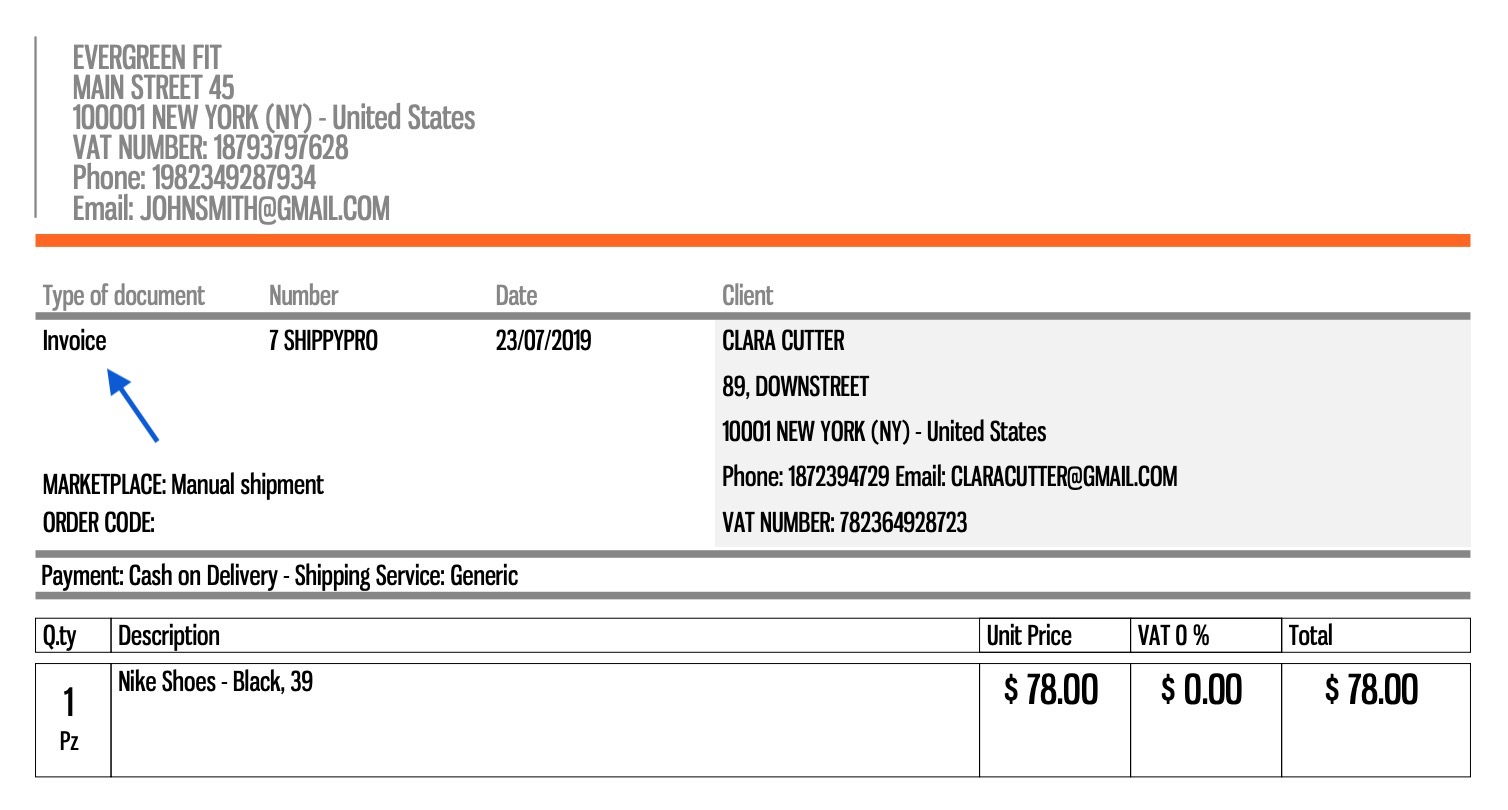
Click on Confirm to open the document in a new tab. You can either print it or download it directly!
Here's how the Invoice looks like:
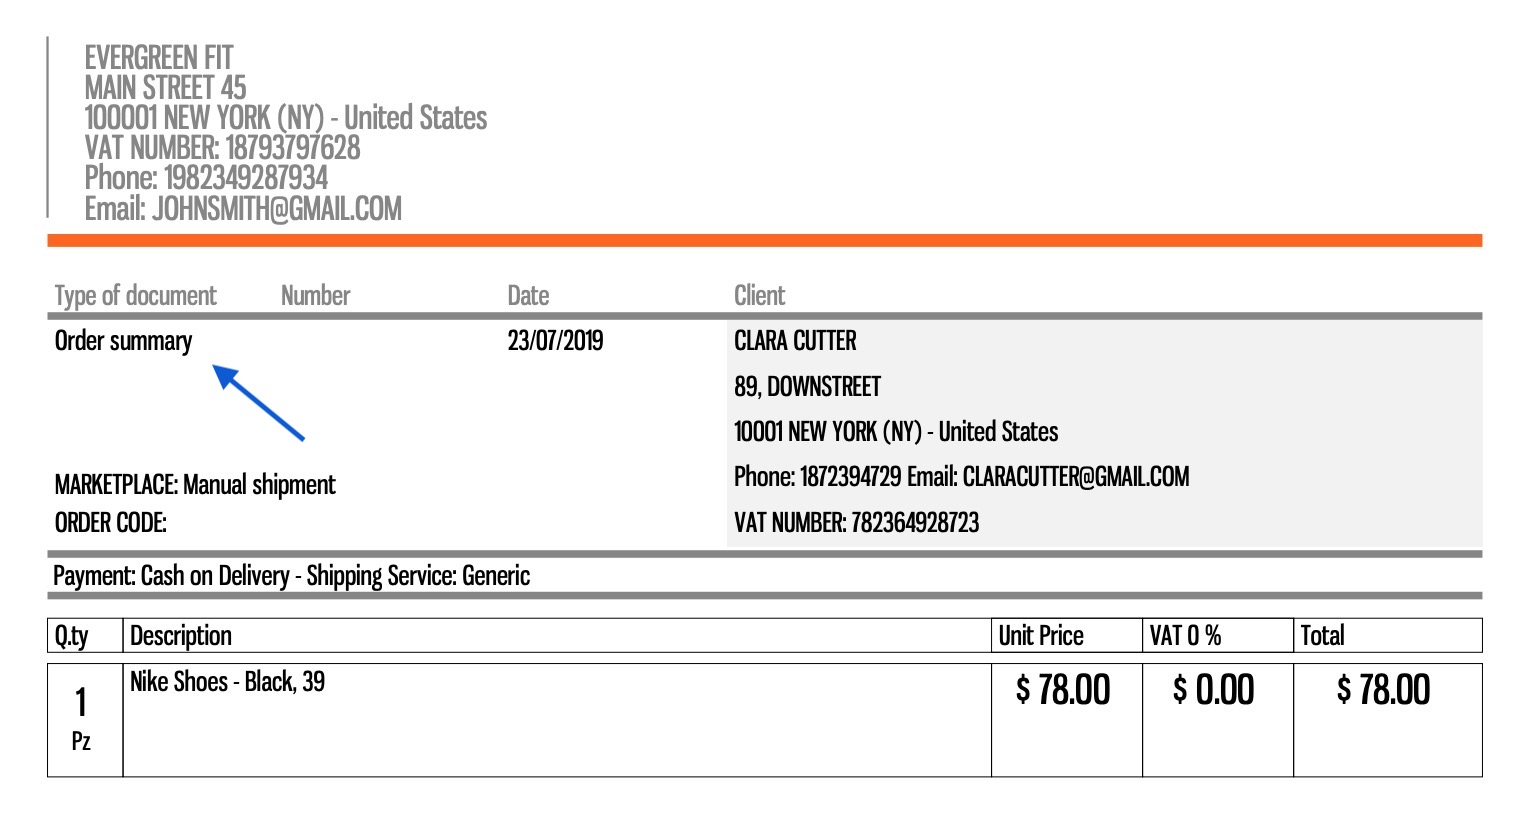
And here is the Order Summary:
📌 Kindly note that VAT is applied by default in case of European countries, it is not applied for non-EU countries.
📌 Would you like to insert your EORI number in your invoice? Add it in My Profile section.
📌 At the moment it is not possible to upload the Shippypro invoice on a manual shipment.
2. How to download my invoices
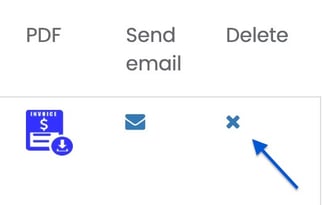
All the Invoices you created will be saved into Label Creator > Invoice Manager.
You can Download them by clicking on the blue icon or delete them.
-4.gif?width=351&name=ezgif_com-video-to-gif+(40)-4.gif)
To download multiple invoices in PDF, select the orders and then click on Create Invoices in PDF:

You can also download multiple invoices filtered by a time interval. Please note that you can set up to 3 months:
-2.gif?width=400&name=ezgif_com-video-to-gif+(47)-2.gif)
3. How to customize my invoices
With ShippyPro, you can customize the layout of the Invoices you send to your customers.
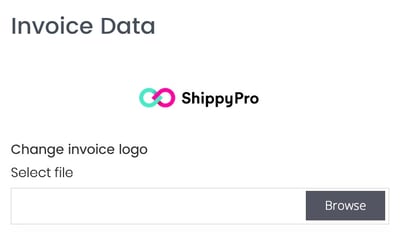
To do that, click on My Profile > Invoice Info.
-
Here you can change your Invoice Logo by clicking on Browse.
Note: Please note that you can upload only jpg and png file, max dimension 250 x 250 px.
-
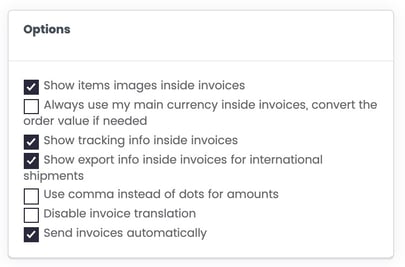
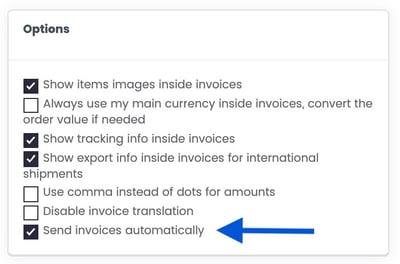
You can also edit other general options:
-
On the right side of the page, you can add some additional information for your customers inside the Invoice Footer.
-
You can also change your Invoice Number. This number is sequential, so if you add 6, the number of the next invoice will be 7.
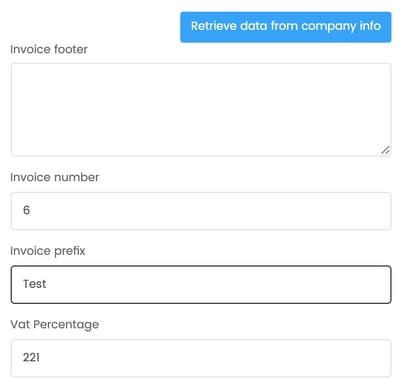
📌 Invoice numeration is progressive and does not reset with the start of the new year.
4. How to edit an Invoice
If you'd like to edit an Invoice, you should overwrite data changing the fields you'd like to edit.
Here's how to do it step by step:
-
Open the Invoice you'd like to delete and write down its Invoice Number:

2. Delete the Invoice you'd like to edit from Label Creator > Invoice Manager.
3. Search and Select the order from Label Creator > Shipping Labels and click on Actions > Create Invoice or Order Summary.
4. In the window that pops up, the field Progressive is sequential. Please enter the number before the one of the invoice you deleted. For example, if you'd like to edit the Invoice number 7, put 6 and you'll create a new Invoice n. 7.
-3.gif?width=500&name=ezgif_com-video-to-gif+(42)-3.gif)
🔑 Upgrade your plan to an Annual Plan to remove our Logo from invoices and create Order Summary with Barcode, the easiest and quickest way to elaborate your Shipments with Printnode. Write to sales@shippypro.com
5. FAQ
Why am I receiving the error "Invalid input: please, check your data" when trying to generate my invoice?
Make sure to delete the less-than character < in your items' description.
To avoid any future issues, you should remove these special characters directly from your marketplace, it will not be accepted by the system due to security reasons.
How can I send the invoices to my customers?
Automatically
With ShippyPro you can automatically send Invoices to your customers as soon as you create them.
You can set this option from My Profile > Invoice Infos > Options.
Manually
Alternatively, you can send invoices manually from Label Creator > Invoice Management.
-
To send invoices per mail for a single order, click on Send email on the right side of the page:
-2.gif?width=300&height=183&name=ezgif_com-crop+(2)-2.gif)
-
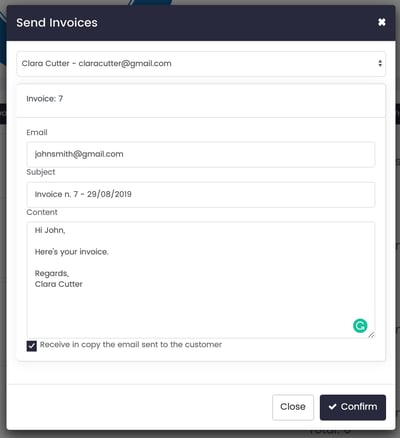
To send multiple invoices per mail, select all the orders you'd like to include and then click on Send Invoices by email.

-
In the window that pops up, you can edit the subject and content of the email and also send the email with a different address (the default is no-reply@shippypro.com). Tick the box at the bottom of the page if you'd like to be in copy.
Invoices will be created accordingly to the language of the Country of destination.