
Here's how to connect Amazon step by step
Connecting your Amazon Seller Account is normally simple and quick. However, some steps might be tricky sometimes.
Follow these guidelines carefully to be sure you're on the right track! 🎉
In a few minutes, you'll be ready to ship your orders imported directly from Amazon Italy, UK, France, Germany, Spain, Netherlands, Egypt, Turkey, Sweden, Poland.
⚠️ Just a quick note, please remind that you can have just one connection per profile. Which is to say, if you already connected your Amazon account to a ShippyPro profile, you won't be able to connect it to a different one at the same time.
- First of all, Amazon Seller Central
-
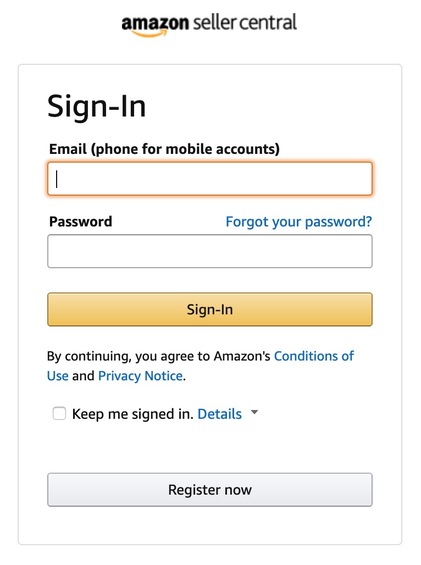
Sign in into your Amazon Seller Central Account by clicking on this link: https://sellercentral.amazon.it/gp/homepage.html. Enter then your Amazon Seller Central username and password and log in.
📌 Note: This option is only available for Amazon Professional sellers, check here Amazon Seller Plans.
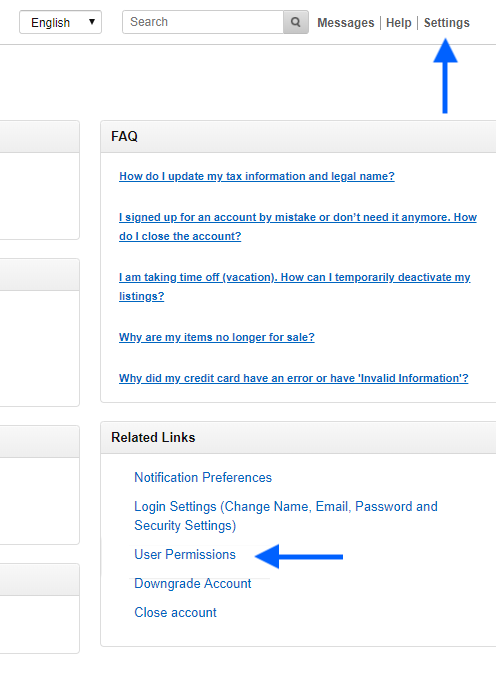
2. Click on Settings on the top right corner of the page and then on User Permissions:
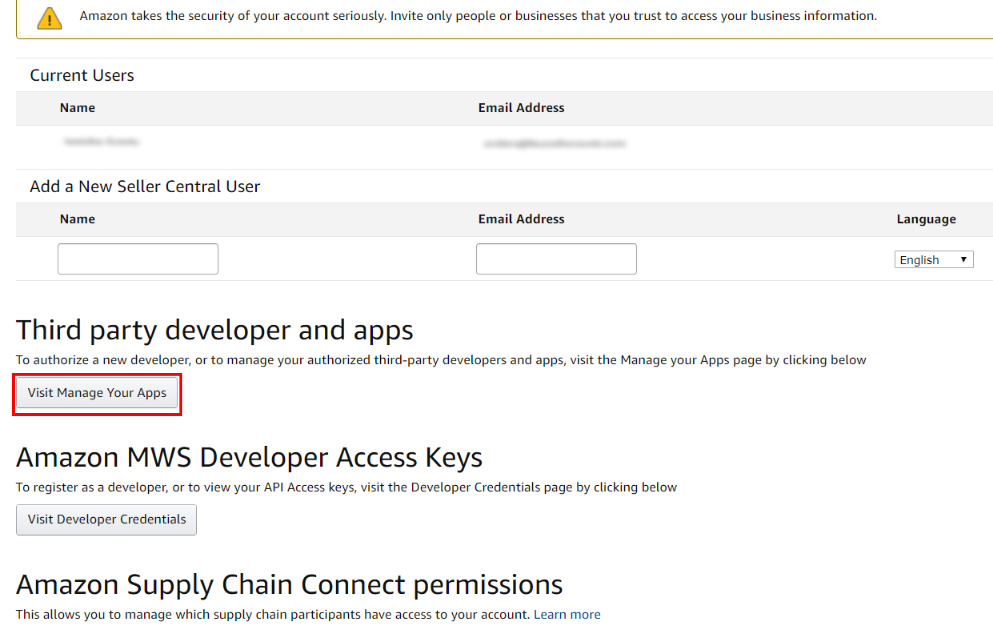
3. Under Third Party Developer and Apps, click on Visit Manage Your Apps:
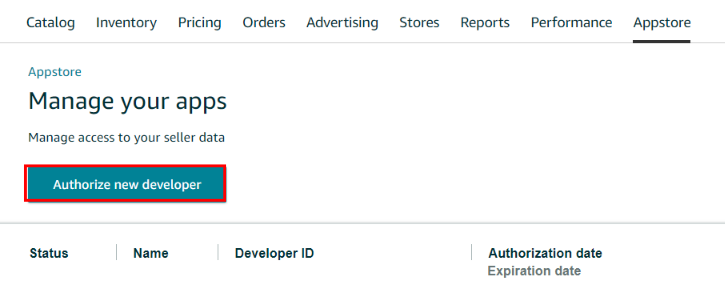
4. Click then on Authorize New Developer:
5. You'll be redirected to Amazon Marketplace Web Service (Amazon MWS), where you need to authorize ShippyPro as a developer:
Developer Name: ShippyPro
Developer ID: 9664-0134-0729
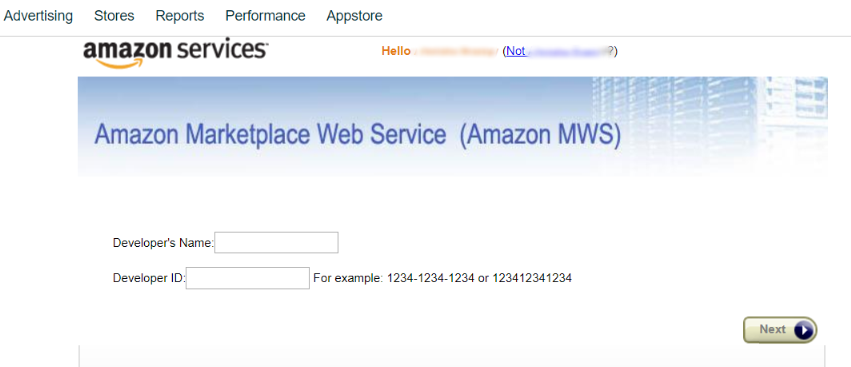
6. Click on Next on the right side of the page and read over Amazon's terms of service. Check the box to agree and confirm with Next.
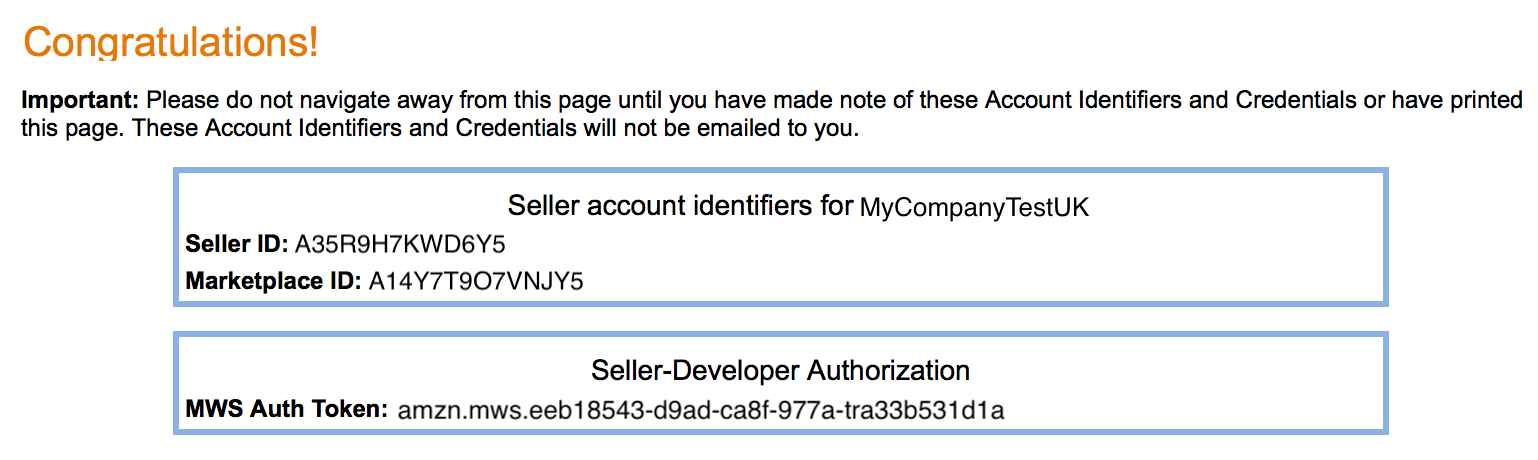
You will then see your Seller ID and MWS Auth Token.
📌 Note: You only need to copy and paste these two values into ShippyPro. Marketplaces ID won't be required.
7. From your ShippyPro Account, go to Marketplaces section. Click on the Amazon logo to start connecting your store.
-Apr-15-2024-09-04-02-7750-AM.gif)
8. Fill then all the required fields and the optional one. Here's a brief explanation of them.
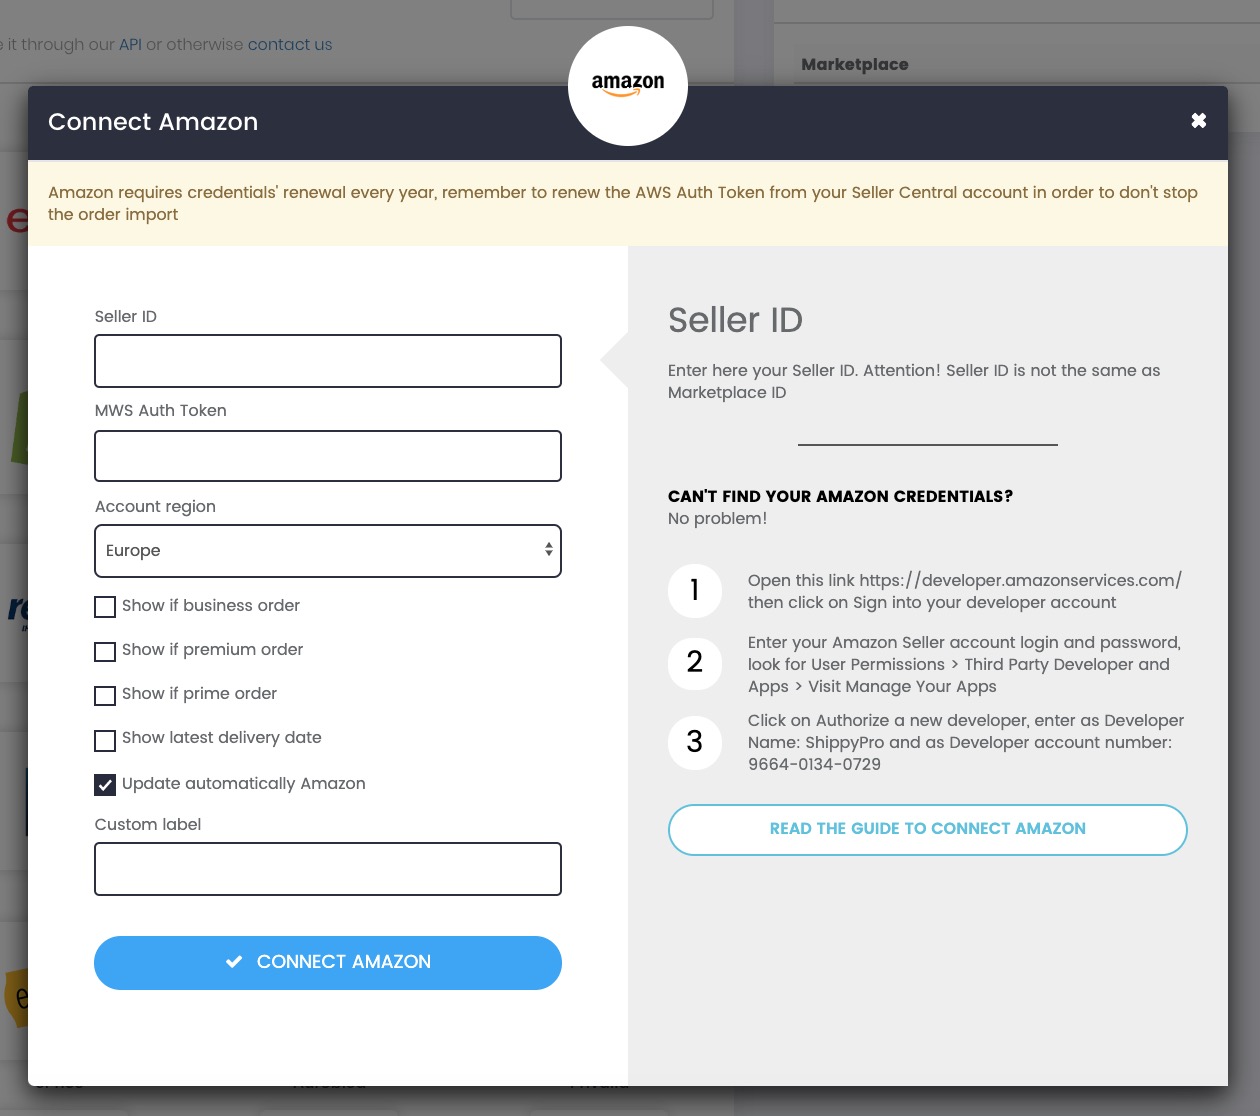
Seller ID and MWS Auth Token ⚙️
Mandatory. Copy and paste the Seller ID and MWS Token from your Amazon Seller Central Account to ShippyPro. Remember that Marketplaces ID is not a required field.
Account Region 🌎
Mandatory. The default region is Europe. This means that if you sell on Amazon.it, Amazon.de, Amazon.es, Amazon.se you don't need to add multiple Amazon Accounts in ShippyPro. Only if you have two stores (and so two different Amazon Seller Central login credentials), you need to add two Amazon Connections.
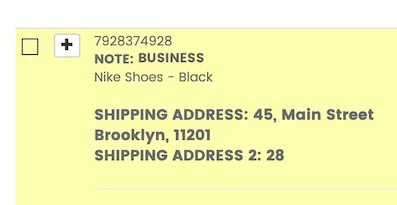
Show if business order 💼
Optional. By ticking this box, all business orders will be correctly imported into ShippyPro with a yellow note. This will help you remind that this order needs an invoice.
Show if Premium order ✨
Optional. Tick this box if you'd like your Premium orders to be flagged with a yellow note.
Show if Prime order ⚡️
Optional. Tick this box if you'd like your Prime orders to be flagged with a yellow note.
Latest Delivery Date ⏳
Optional. Decide whether to show latest delivery date or not.
Update automatically Amazon ✅
Optional. Tick this box to automatically update Amazon with shipment status "Shipped" and tracking number.
📌 Remember that Amazon will not receive further updates after the Shipped status, so it won't be possible to update Amazon with further tracking statuses such as Delivered
Custom Label ✏️
Mandatory. Here you can add a custom name or nickname to distinguish this Amazon connection from others.
If you have two different Amazon stores (with two different Amazon Seller Central accounts) you can think of labelling them differently (es: Amazon Myshoes.com and Amazon Mydresses.com). You'll then be able to identify the two Amazon stores at a glance!
Here's how you'll see your Amazon connections from To Ship, that is the page where all your orders will be imported and ready to be shipped.
-Apr-15-2024-09-03-55-0989-AM.gif)
9. After you've setup all the fields, click on the blue button Connect Amazon.
🔎 How can I know that Amazon is correctly connected?
If the connection is correctly established, you'll receive a positive message telling you that the marketplace was successfully connected.
When and where will my orders be imported?
After Amazon is successfully connected, all your pending orders will be imported with all the order details and product images in Label Creator > To Ship in 10 minutes, ready to be shipped in a few clicks.
Inside To Ship, you'll see all your pending orders that will be imported from all your stores every 10 minutes.
Click here to read a step-by-step guide on how to start shipping your orders:
Why do I see the wrong image for my items?
In case you have different products, you'd need that each product has a different SKU: otherwise in case of repeated SKUs and different image, only the first image will be displayed for each one.
To sum up, just remind to follow this super understandable rule:
1 SKU = 1 Image
🔴 Something went wrong during the connection?
First of all, don't panic!
Here are some tips that help you solve your issue:
📌 Step 1: Check your Amazon Seller Central Credentials
Have you checked your Amazon Credentials? Remember that you need to paste only your Seller ID and MWS Auth Token into ShippyPro.
Be sure you don't get confused: Marketplace ID is not required.
📌 Step 2: Have you authorized ShippyPro as a developer?
Remember that you need to authorize ShippyPro as a developer with these credentials:
Developer Name: ShippyPro
Developer ID: 9664-0134-0729
Done! 🎉
🔍 What's Next?
Tags: Amazon France, Amazon Poland,