![ShippyPro Logo-1.svg]](https://help.shippypro.com/hubfs/Imported%20sitepage%20images/ShippyPro%20Logo-1.svg)
You can customize your shipping labels by adding customized fields on them.
Let's see how you can do this step by step!
Please note that we receive the generated label directly from Carrier's server.
In fact labels content depend on the Carrier and not all of them will allow to print the whole data.
❓How can I edit my Shipping Labels preferences?
From General Settings > Preferences, you can edit the content description printed on your labels from this specific sections:
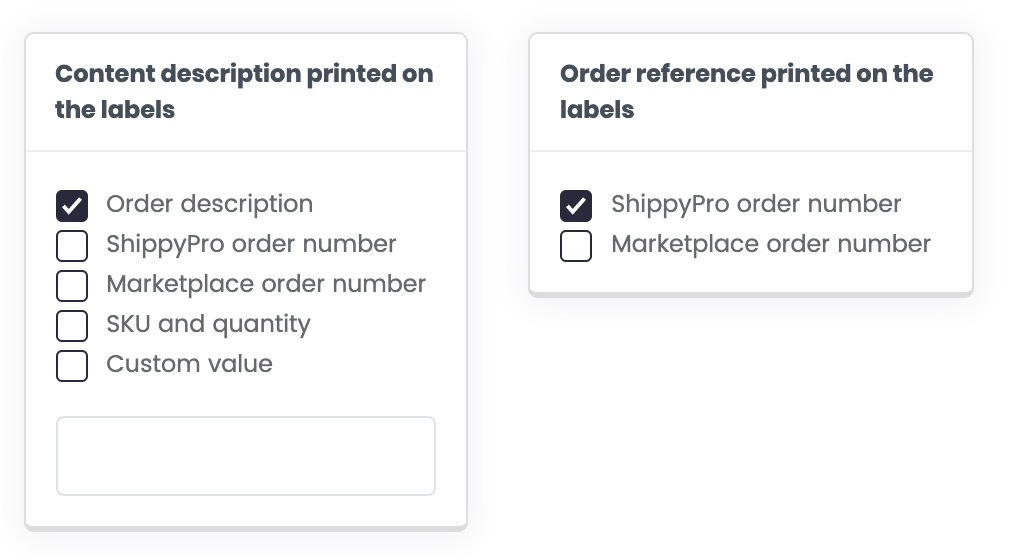
❓How can I change the content description printed on the labels?
From General Settings > Preferences, you can choose what information to include inside your shipping labels:
-
Order description: The order description will be automatically retrieved and included.
-
ShippyPro order number: You can decide to include this or not.
-
Marketplace order number: You can decide to include the order number that appears on the marketplace.
📌 The marketplace order number cannot be changed when you send the order. -
SKU and quantity: Tick this box if you'd like to include the SKU and quantity of the order.
-
Custom value: Tick this box and enter the text below.
Please pay attention that only one option can be selected from those listed above.
❓I selected SKU & Quantity as Content Description printed on the labels, but why are they not showing on the label?
Please note that even if SKU and Quantity is flagged, the data may not be printed due to courier side restrictions.
❓Can I print the order reference on the labels?
You can choose whether to show ShippyPro order number or Marketplaces order number on the shipping labels General Settings > Preferences
❓Why are address lines split, omitted or positioned differently?
Does your label show address details on different lines, leave a blank line or omit additional information? Labels are generated directly by the carrier’s servers: the carrier defines the layout, field placement and character limits, so not all information can be printed in the same way.
How to fill in the address fields
In general, enter the address as follows:
- Address 1: street name and house number
- Address 2: additional information (floor, apartment, unit, etc.)
Some carriers apply specific rules, described below.
DHL Parcel
DHL Parcel does not support a second address line. Always include the house number in Address 1.
DHL Connect
Use Address 1 only for the street name and house number, and Address 2 for supplementary details such as an apartment or unit designation.
📌 Note: Whether Address 2 is printed can vary by destination country. This guidance applies only to DHL Connect, not to other DHL integrations.
For carrier-specific setup, see How to connect DHL Connect to ShippyPro.
Poste Italiane
Address information is divided between Address 1 and Address 2. Text exceeding a field’s character limit is split according to the carrier’s field limits, so a blank line or a split address on the label is part of the standard Poste Italiane layout and not an anomaly.
Automatically moving additional address information into the C/O (Presso) field is not currently supported.
For carrier-specific setup, see How to connect Poste Italiane to ShippyPro.
To see what you can customize on your labels, see Customize your shipping labels with Label Design. Label Design cannot override the carrier’s address-field constraints.