Easy Return is the perfect solution for your Reverse Logistic Challenge.
Offer an outstanding experience to your customers with the most advanced Ecommerce Returns Manager!
ShippyPro allows you to create your Return Form to be embedded on your website or send by email in just one click.
Let's see how it works!
Summary:
1. How Return Form works
Here are all the steps explained one by one!
-
Set up your Return Rules
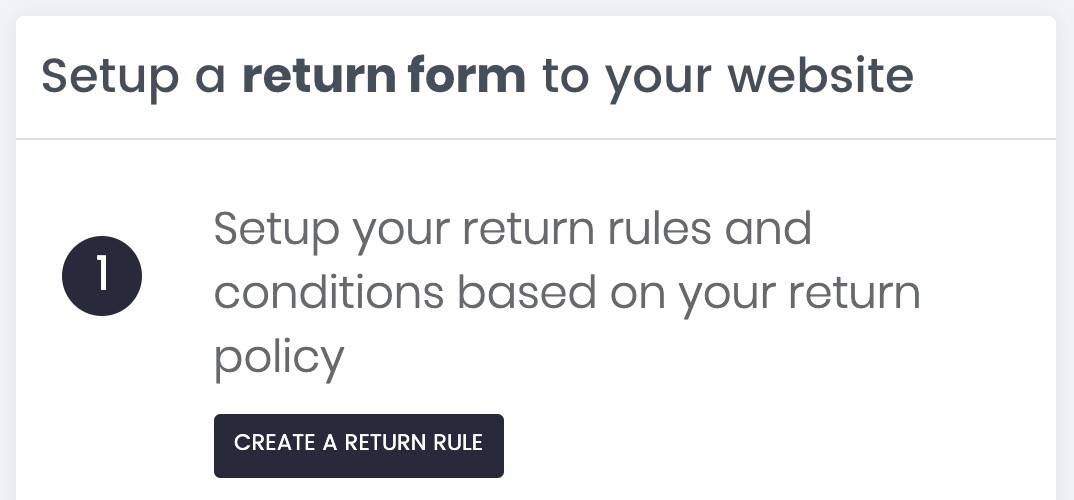
Before sharing your Return Form with your customers, you need to set your Return Rules.
Click here to learn how to set up your Return Rules step by step: How to set up a Return Rule
Then, after the set up, click on Returns > Return Form. You can either include a simple code on your website or copy a link to send your return form per email.
-
Embed your Return Form with a Code
To add your Return Form to your website, simply copy and paste the code into your page between the <body><⁄body> tags.
The widget will appear wherever you place it.
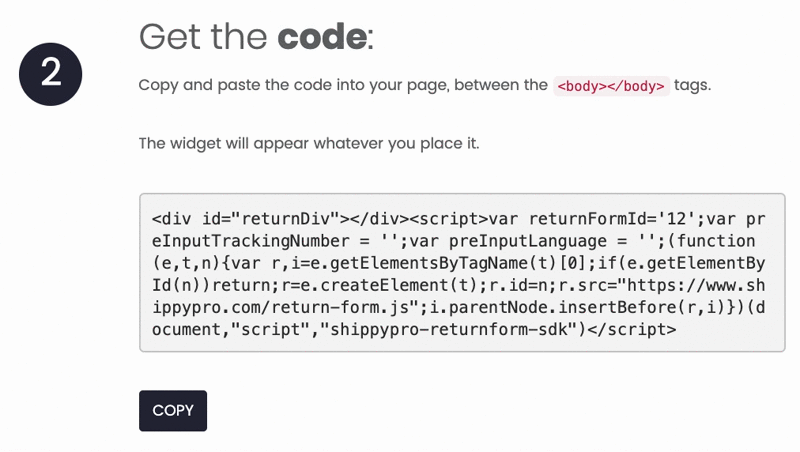
On the right side, a draft of the Return Form will be displayed.
You can also Configure a Custom Domain:
Click on Configure a Custom Domain and in the menu that will pop up your Website Name as well as Custom Return Form Domain.
📌 g.e. add yourstore and return.yourwebsite.com
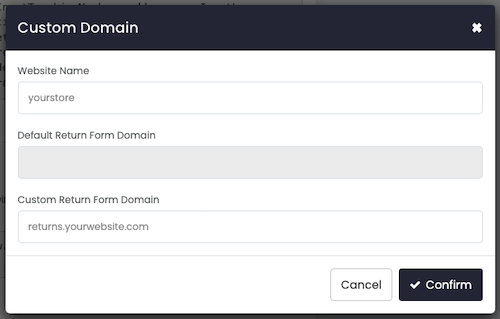
Click then on Confirm.
-
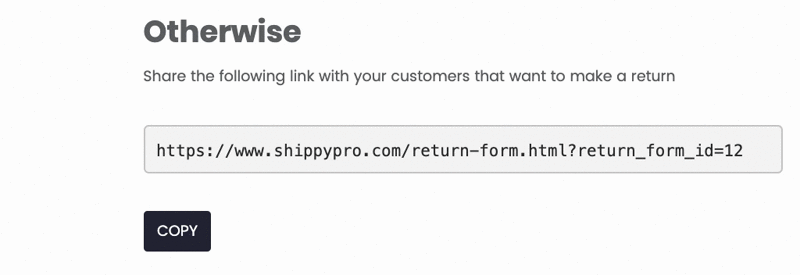
Send your Return Form per Email
You can easily send your Return Form per Email to your customers as soon as they ask for a return.
Just copy and paste the link you'll find here:
-
Set up additional options
Lastly, you can add some additional options to your Return Form.
- You can decide to include a box that will appear before the customers confirm the return. You can add specific questions or just some information.
Note: Please note that filling this field is not mandatory for the customer in order to proceed.
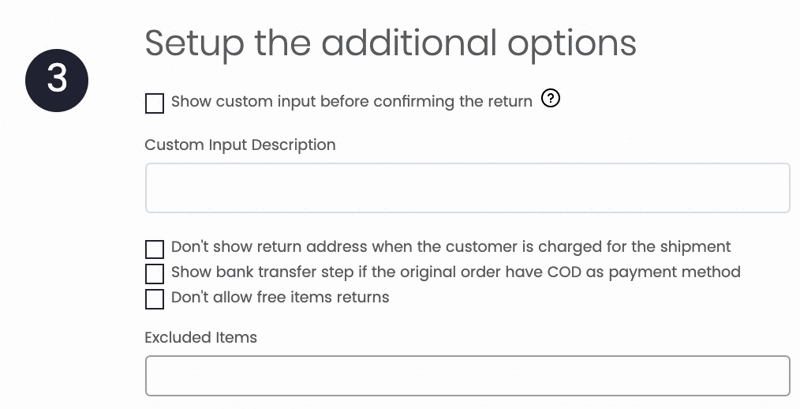
- Then, you can decide whether to show the return address or not when the customer is charged for the shipment.
- A bank transfer step can be included if the original order have a COD as payment method.
- Show proof images basically means that the customer will have an additional mandatory step before proceeding with the request in which they'll need to attach an image of the item to return.
- Lastly, decide whether to enable or disable the return for free items and exclude some specific items from your catalogue.
In order to read the notes you need to enable Personalized Input from Returns > Return Form

Then whenever you'll receive a Return Note it be shown under Custom Input Value from Returns > Analytics.

2. FAQs
How can I change my Return Form language?
It is only possible to change the language of the return form if you have embedded our code into your website (point 2 of this article). In this case, you can add the language code within the JS preInputLanguage to switch to your language:
e.g. preInputLanguage = ‘en’, ‘it’, ‘fr’, ‘de’, etc.
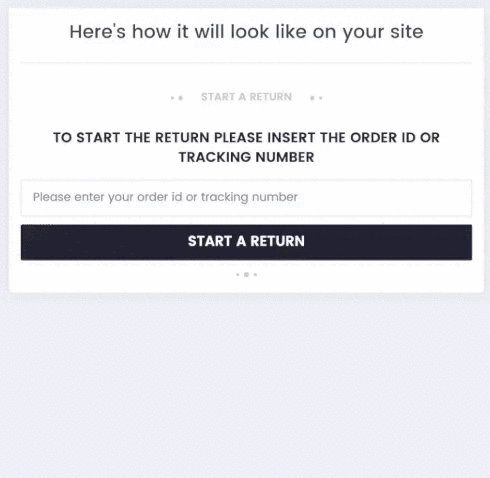
How do my customers see my Return Form?
Here's how your customers will see you Return Form either from your website or with the link sent per email.
Your customers will only need to enter their order number to start the return process and follow the steps for returning the item in a few clicks:
Can I customize my Return Form format?
At the moment Return Form follow a standard format that it's not customizable.
But, good news! We're already working to implement this possibility with future updates of the platform.
Where can I find my Returns?
After configuration, you can check your Returns by clicking on Shipments > Labels Generated > Views > Returns (or by filtering for returns).
Here you can find, filter, edit and print labels for all your returns.