ShippyPro Easy Return is the best solution for Reverse Logistic challenges.
It allows you to create your return portal, embed it in your website and put your returns in autopilot!
In order to start creating your Return Portal, you first need to create your Return Rules.
Let's see how!
Summary:
1. How to set up your Return Rules
You can set up your Return Rules following these steps.
Click on Returns > Return Rules from the drop-down menu.
In this section, you'll be able to set rules and conditions to your return process. You can create, edit and translate your rules.
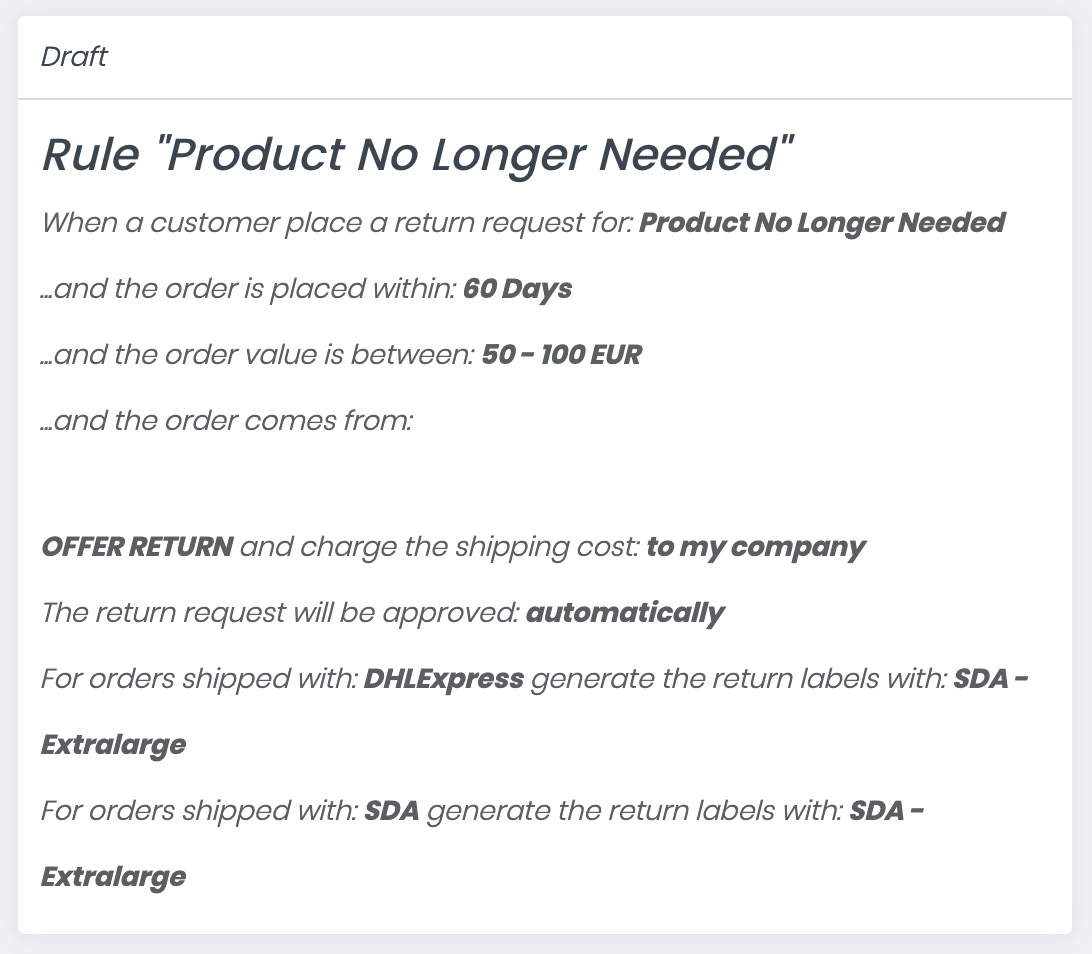
On the right side, you can see a draft of the return rule you're currently editing.
-
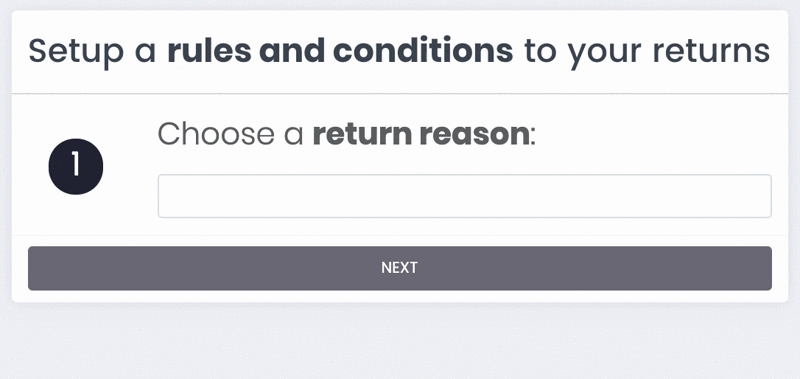
Choose a Return Reason
Start creating your rules by selecting or adding the return reason you'd like to set. You can also customize the reason according to your product catalogue. Try and write it down. ✏️
-
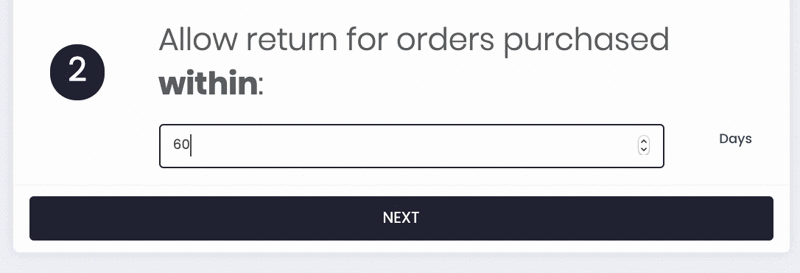
Set a Time Limit for Returns ⏳
Select the number of days within which you customers must return the item/s:
Note: days limit starts from the delivery date.
-
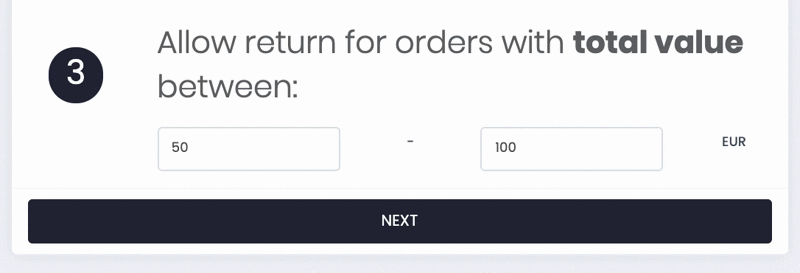
Order Value Range
Enter the Range in which the Order Value must be included.
-
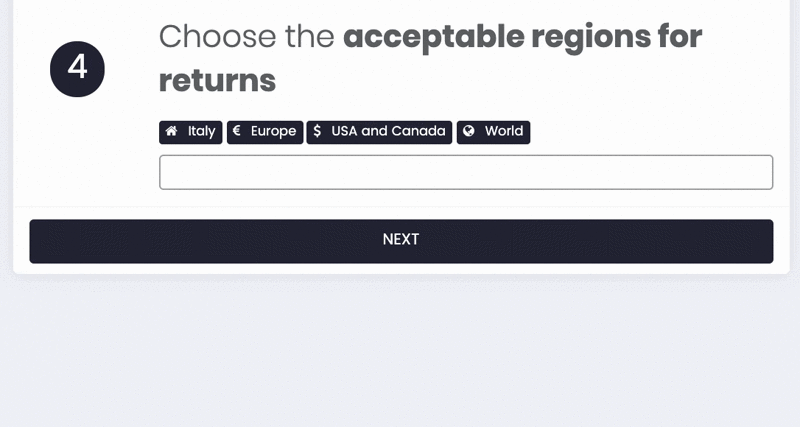
Choose Acceptable Regions
You can choose to accept Returns only in specific Countries.
By clicking on each region, you can exclude some countries clicking on ✖️ or include other typing its name.
-
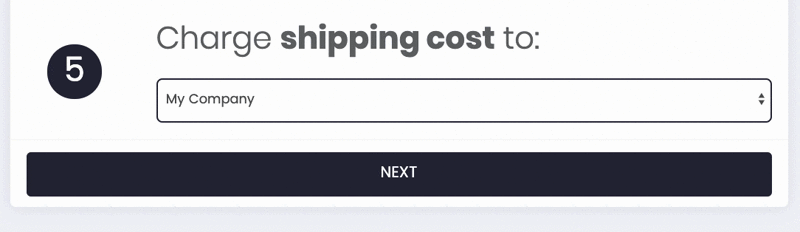
Who pays for the Return?
Decide whether to pay for the return or charge it to your customers.
If you decide to charge the cost of the return shipment to your customers no label will be generated and consequently, no email will be sent to the customer.
In this case, ”Inbound: Not Available” will be displayed in the Return List in Return Analytics
Note: on Easy Return Carrier's Rule will be applied on every Return Rule.
Other settings can be different from rule to rule instead.
e.g. allow return within N days, allow return if Country = X o Y
For this reason Carrier's Rule are replicated and you can't set different carriers for different rules.
-
Decide to approve it manually or automatically
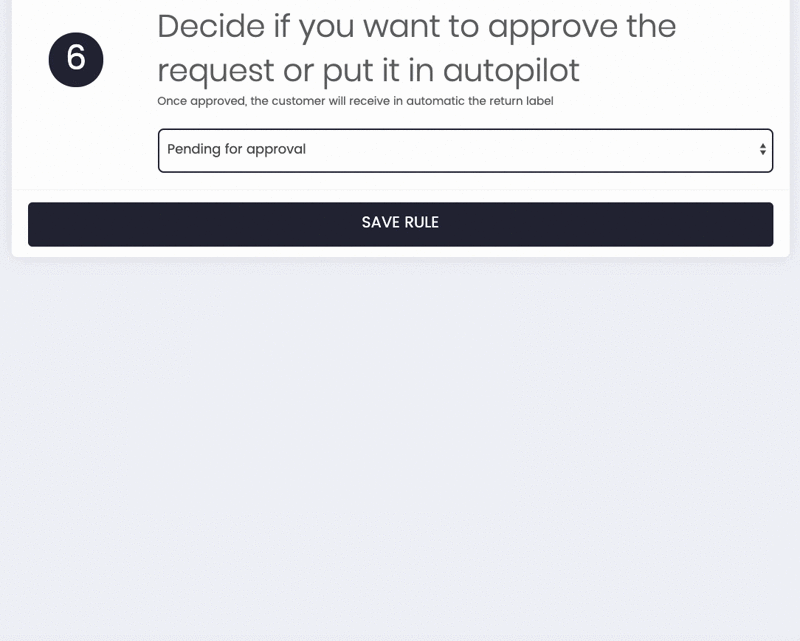
If the company bears the return costs, you can decide whether to approve the request automatically or whether you prefer to examine it manually before sending it.
Automatic approval
- Select the couriers with whom you want to manage your return shipment
- Select the return address (you can add the sender address in the "My addresses")
- Click on Save Rule
- The customer will automatically receive by email the return label created according to your settings.
You will find the automatically created return shipments in Labels generated.
Note: Automatic confirmation is applied to all existing return rules as a preference of your terms.
Manual approval
The return request will appear in the To Ship section, together with the Reject button. If you proceed with shipping the order and creating the label, it will mean that you have approved the request.
If you choose to manually approve the return and create the shipment/return label from the Returns section in To Ship, you will need to manually reverse the sender and recipient addresses. To do this, follow the same steps as you would for creating a standard return label: click on the blue arrow ⬅️ to switch the sender and receiver addresses. This action will result in a shipment that displays the yellow arrow icon, indicating a return, alongside the green checkmark icon for the selected courier.
If, on the other hand, you choose to charge the return costs to the customer, the return request will not be shown in To Ship (because it is not pending approval) or in Shipped Orders (because the return shipment will be handled by the customer outside of ShippyPro).
You will however be able to view return requests from Returns > Analytics > Return List.
2. FAQs
How will my customers receive the Return Label?
Your customers can print the shipping labels in one click.
Once the return request is approved, ShippyPro sends the Return Label of your carriers by mail with return instructions.
Can I preview my Return Rule?
Before you click on Save Rule, take a look at the Draft that you'll find on the right side!🔍
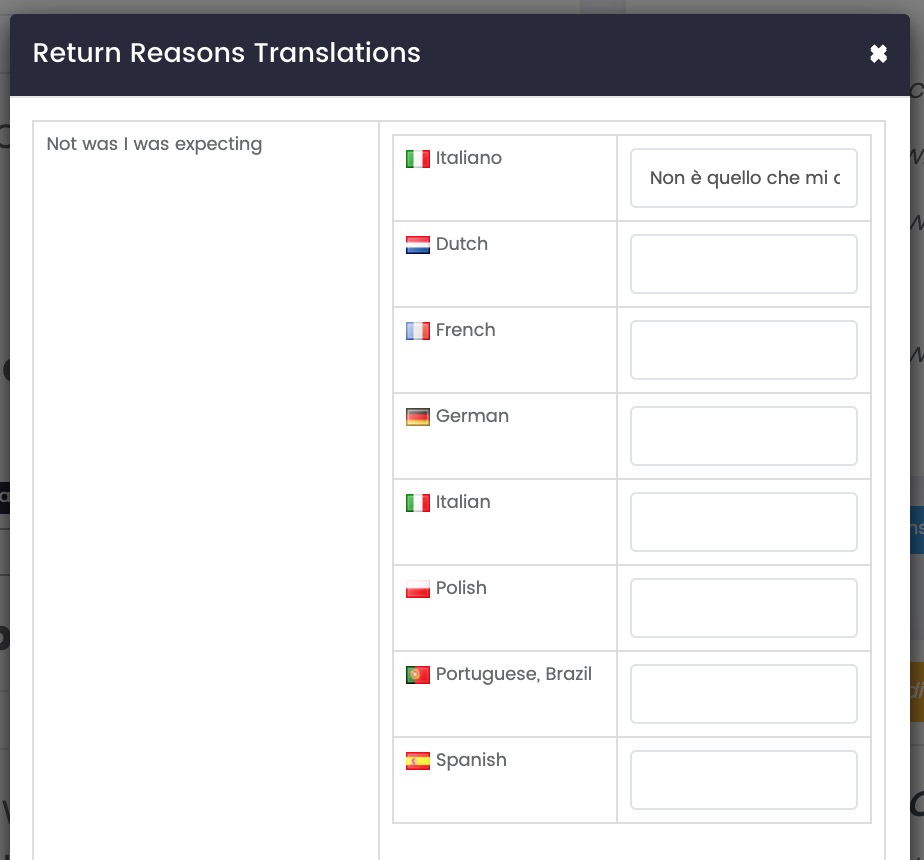
Can I translate my Return Reasons?
You can add translations for the Return Reasons you included on your Return Rules manually, even if you entered them manually.
Click on Set Return Reasons Translations s on the right side of the page to translate it in 8 languages:
-2.gif)
From the window that pops up, you can manually add translations for 8 languages. Your customers will view them in their language according to the country of destination!
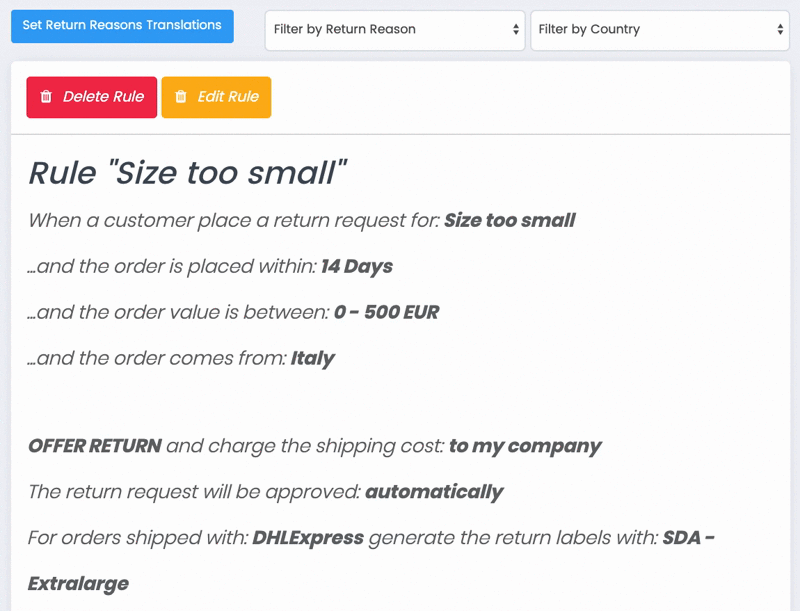
Can I edit or delete my Return Rules?
All your Return Rules will be gathered on the right side of the page.
You can filter your Return Rules per Reasons and Country. You can either delete them or edit them by clicking on the relative buttons.
What happens if I add a new Carrier?
When you add a new Carrier you need to update your return rules and also apply to its mails the changes done to the others
So if you add DHL, for example, you'll need to set the specific rules for that carrier, as well its return email from Returns > Email Templates.
What happens if I disable a Carrier associated with a rule?
When a carrier connection is disabled from Connections>Carriers>Disable but remains associated with a return rule, if the related Account Number is still active and working the return rule will always rely on that carrier (even if disabled), you will then need to edit the rule if you wish to change carrier.