WooCommerce is one of the most widespread ecommerce Marketplaces in the world. Use ShippyPro to take maximum advantage of this service and optimise your shipping process.

Summary:
1. Before you start
If you are using WooCommerce version 9, please use the WooCommerce official plugin that allows you to use the older version with ShippyPro: click here.
Please note this won't be compatible with HPOS.
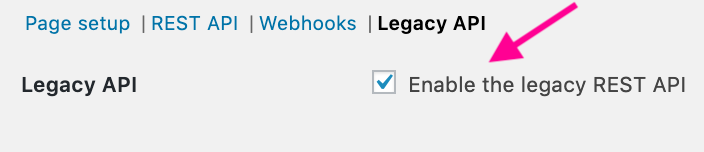
To connect WooCommerce to ShippyPro, you should first enable the option Legacy API from WooCommerce > Settings > Advanced > Legacy API which needs to be necessarily enabled by an admin account.
2. Connection steps
-
Once enabled, you can proceed from your ShippyPro profile > Marketplaces > click over WooCommerce logo > enter your store URL including http:// - https://.
-
The URL of the store must be public in order to connect it and import orders.
-
You will be then asked to authorize ShippyPro to import and update orders, once confirmed WooCommerce will be connected.
-
If the connection is correctly established, you will receive a positive message. By clicking on To Ship, all your pending orders will be imported and you will be ready to start with ShippyPro.
Make sure to include "www." at the beginning of your URL when entering it in the ShippyPro connection.
3. Additional options
-
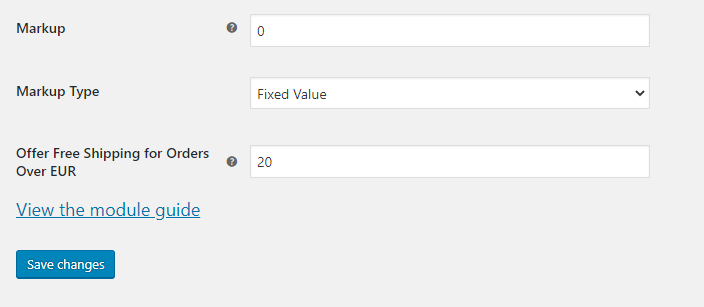
You can add a surcharge deciding between a fixed value or percentage on your Live Shipping Rates:
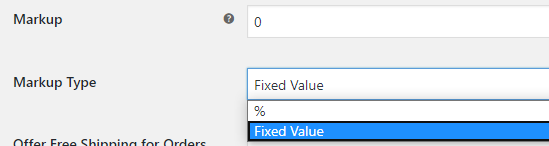
from Woocommerce > Plugins > ShippyPro Live Shipping Rates > Settings.
Add your markup value in the dedicated field and whether to apply or not Free Shipping for Orders Over a certain price.
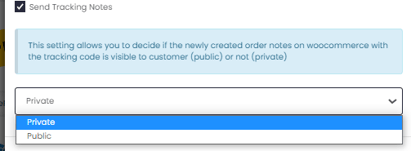
- If you flag "Send Tracking Notes" ShippyPro will send to WooCommerce the tracking code in the order note field. You can also set if the note should be private or shared with the customer, and so public.
-
You can manually take action on the single order by choosing a status from one of the available options: Waiting for payment, Processing, Suspended, Completed, Cancelled, Refunded, Failed, Draft.
- How to add tracking numbers
You have 2 options.
OPTION 1
Flag in the WooCommerce connection from the Marketplace page the following two boxes:
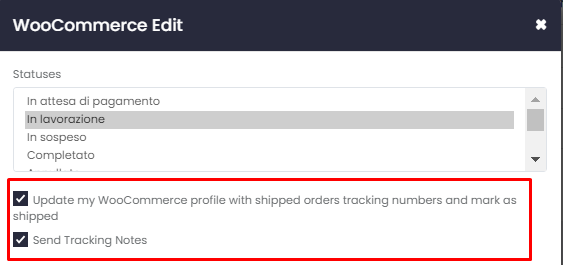
"Update my WooCommerce ..." updates the order status as "shipped".
"Send Tracking Notes" sends the tracking code within the "notes" field in the order details. You can also decide whether to make the note private or shared with the merchant, and then public.
This option will not send any carrier name or tracking links.
OPTION 2
-
Configure a “webhook” in ShippyPro that will call a specific endpoint in your WooCommerce environment for each shipment (events “order_shipped” and “tracking_update”).
-
Once the webhook is configured in ShippyPro as explained above, you need to install this plugin for WordPress called "Code Snippets" on your site (assuming you're running WooCommerce on WordPress)
-
Once the plugin has been installed and it is activated, you will have a new sidebar menu item displayed:

-
You should then click on “Add new” and copy and paste the PHP code linked > here.
-
Once saved, this code will open a “listening endpoint” on your site which will listen for any request coming in from ShippyPro’s webhook you have configured earlier.
-
All the events of type
ORDER_SHIPPEDandTRACKING_UPDATEcoming in (as in from ShippyPro's webhook to customersite.com/wp-json/bm/v1/shippypro) will be saved to your local database and associated to the corresponding WooCommerce orders. They will be visible on the order detail page on WooCommerce.
It's important that your site's response to our webhook complies with the indications given here, you will decide the content of the response.
4. Troubleshooting & Errors
Are you facing some issues during the connection? Please visit the following page:
Are you facing some issues during the importation? Please visit the following page:
How to fix WooCommerce import issues![]() Address import: The recipient address imported for orders will be the one in the Shipping data in WooCommerce. Only if it is empty in this section the Billing address will be imported instead.
Address import: The recipient address imported for orders will be the one in the Shipping data in WooCommerce. Only if it is empty in this section the Billing address will be imported instead.