
Learn how to create a Picking List in a few clicks
This legacy version will soon be discontinued. To activate the new version, click the toggle in the top left:

If you are already using the new interface, we invite you to check this article.
Creating Shipping Documents with ShippyPro is really easy. With just a few clicks, you'll be able to create a Picking List, for example.
This document is really useful to prepare your shipments and fulfill your customers' orders quickly.
Generally, a picking list shows order details, SKUs, recipient address, items description and price.
Let's see how to create it step by step!
Summary
- Before you start
- Select your shipments
- Create the picking list
- Keep a record of your orders
- Troubleshooting & Errors
1. Before you start
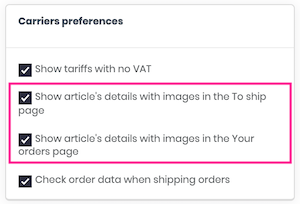
Remember that you first need to enable Article Details from My Profile > Preferences > Carriers preferences for that to be show in the Picking List.
After that step, you need to ship your orders from Label Creator > To Ship to be able to generate the relative Picking List. Learn how to do it step by step here: How to ship orders from Marketplaces
2. Select your Shipments
In Shipping Labels, select only the shipments you'd like to include inside the Picking List.
-
Tip 1 : If you'd like to select more than 50 orders in one time, consider displaying more orders on Shipping Labels page from the bar at the top of the page.
-1.gif)
-
Tip 2: To speed up your order picking, you can order your shipments by different SKUs, so that you know how many items with the same SKU you need to pick up.
In order to do it, click on My Profile > Preferences.
You'll see a box called Orders table ordering and reference in the lower left corner.
The shipments on Shipping Labels are ordered by ShippyPro Order Number by default, if you'd like to change this parameter click on > Items SKU to order them by SKUs:
-1.gif?width=400&height=228&name=ezgif_com-video-to-gif+(41)-1.gif)
Select all the orders and follow the following steps.
3. Create the Picking List 📄
Click then on Management > Create Picking List to create it.
-1.gif?width=400&height=284&name=ezgif_com-video-to-gif+(34)-1.gif)
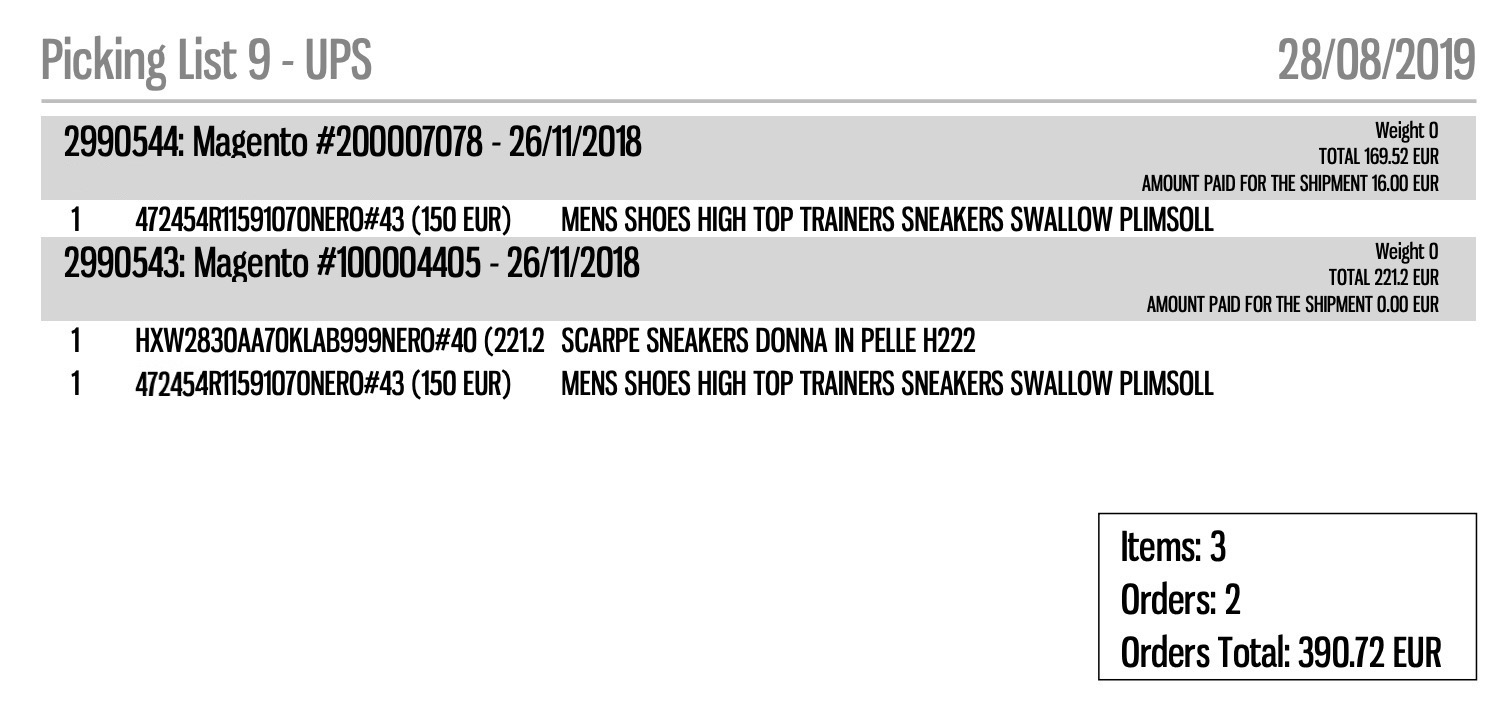
You'll be then redirected to a new tab with your Picking List on it. You can either print it or download it directly!
Here's how it looks:
Since the Picking List needs article details, it will not work with Excel or manual orders, but only with orders coming from a Marketplace
Items are ordered by ShippyPro Order Number by default, contact us 💬 if you'd like to change this parameter.
4. Keep a record of your orders
Creating a Picking List is not the only way to keep a record of your orders and all the shipping info you need.
It's possible to generate an order list that can be edited in Excel.
-
Select all the orders you'd like to include and click then on Shipping Labels > Management > Create Excel:
-1.gif?width=400&height=227&name=ezgif_com-video-to-gif+(36)-1.gif)
From the window that pops up, you can delete the fields you don't want to include and order the columns.
-3.gif?width=400&height=250&name=ezgif_com-video-to-gif+(24)-3.gif)
5. Troubleshooting & Errors
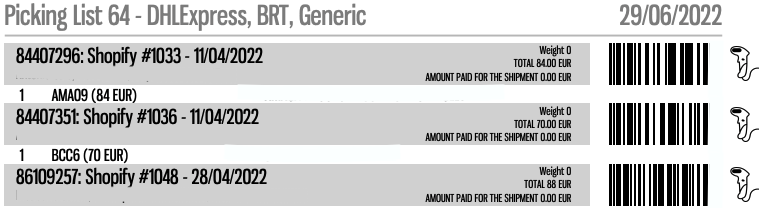
Did you know that you have the possibility to include a barcode to your Picking Lists?
By including a barcode (created by ShippyPro after the activation of the option) to your Picking Lists you'll be able to speed up your logistic process even more!
Take a look at how they would look like:
Contact a member of our team at sales@shippypro.com to start a Trial of this feature!
Where can I find my Picking Lists?
You'll find all the Picking Lists you created inside Label Creator > Picking Lists.
Here you can either Download or Print your Picking List by clicking on the red icon or delete it. Remember that each picking list has its own Number.
-1.gif?width=400&height=227&name=ezgif_com-video-to-gif+(35)-1.gif)