
Let's see how you can connect Stef to ShippyPro in just a few steps.
-Apr-15-2024-08-55-30-0243-AM.gif)
Note: at the moment B2B shipments can only be created from orders imported directly from a Marketplace or they'll end up in error.
Summary:
1. Before you start
To connect your Stef contract to ShippyPro ask your Stef Account Manager your FTP credentials.
If you already have them, please ask your Stef Sales Person or directly to stef-trp_italia_ict@stef.com to confirm that you can start shipping via Shippypro.
2. Connection steps
Once done, add the credentials from Carriers > Click on Stef Logo.
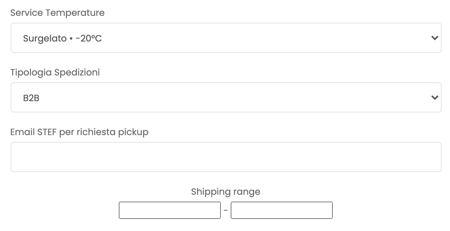
Select then your Service Temperature between:
-
Surgelato • -20°C
-
Fresco • 4°C
-
Non Refrigerato • 4-18°C
And your Shipments Type:
-
B2B
-
B2C
Finally add your Shipping Range by writing 1 on the first field and 99999999 (8 times 9) on the second.
3. Additional options
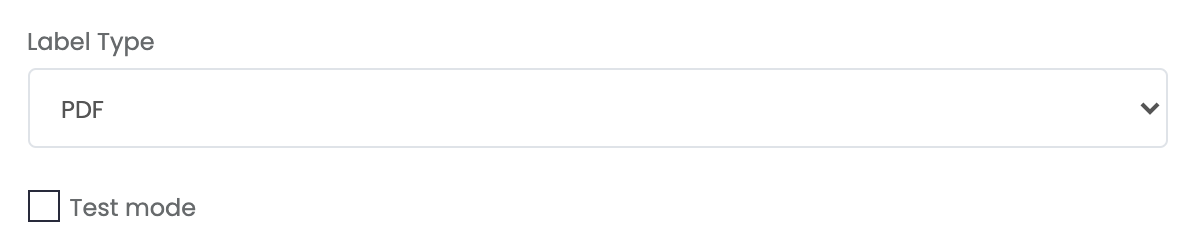
The default Label Type for Stef connections is PDF.
Enable Test Mode if you'd like to use your Test Credentials.
If you are concerned that your customers' phone numbers are not listed on the label, keep in mind that we share this information with the carrier and the delivery person will have this available during delivery if needed.
3. Specific requirements
-
Include your email for Stef pickups, indeed we'll send an automatic email to the Carrier each time your Close Work your shipments. You can retrieve this email address directly from your Stef Account Manager.
Generally Stef automatically books the pick-up for your shipment the day after it is actually created.
Through ShippyPro you can choose your personalised pick-up date directly when generating your shipment by clicking on Courier Options and entering your chosen date.
📌The required format is yyyy-mm-dd -
Remember that once you created the shipments you will need to make the End of the Day to transmit them to the Courier. Find our step by step guide at this link.
4. Troubleshooting & Errors
Duplicated DDTs
In case of duplicated DDTs on carrier's end, you should check with your account manager what is the last DDT number they have registered in their system and modify the lower range for Shipping Range from your Stef connection module.
e.g. if the last DDT registered on Stef's end is 500, you should set the range as: 501-99999999