📍 Where to Find "Teams"
To access the "Teams" section:
- Log in to your ShippyPro account.
- After clicking on your account details (under the ‘Help’ button) in the left side menu, click on 'Settings'
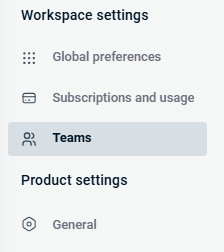
- You will see an additional side menu dedicated to the new settings, which includes: Account Settings, Workspace Settings and Product settings
- From the left sidebar, under Workspace settings, click on Teams
Summary:
Teams
1. Add a new member
Note: only members with the Owner role or members who have Full actions permission for Workspace and General Settings > Teams, can add new members.
To add a new member:
- Go to Workspace Settings > Teams > Members tab.
- Click the ‘Add new member’ button on the right.
- In the modal that opens, fill in the First Name, Last Name, and Email, then assign a Role (if you need to create a custom role, refer to the paragraph “Create a custom role”)
- Click the ‘Send invitation’ button
2. Edit/Remove an existing member
Note: only members with the Owner role or members who have Full actions permission for Workspace and General Settings > Teams, can edit/remove members.
How to edit an existing member:
- Go to Account Settings > Workspace Settings > Teams > Members tab.
- Click the three dots icon on the row of the member you want to edit.
- In the dropdown that appears, click Edit.
- In the modal that opens, update the necessary information.
- Click Save to apply the changes.
- Go to Account Settings > Workspace Settings > Teams > Members tab
- Click the three dots icon on the row of the member you want to remove
- In the dropdown that appears, click ‘Remove’
- In the confirmation modal, click ‘Yes, remove it’ to confirm
3. Disable/Enable member access to your Team
You can easily disable and then re-enable a member's access to your Team without removing them from your Team. This is useful if you need to re-enable them in the future.
Note: Only members with the Owner role or members who have Full actions permission for Workspace and General Settings > Teams can enable/disable member access to your Team.
How to disable member access:
- Go to Account Settings > Workspace Settings > Teams > Members tab.
- Click the three dots icon on the row of the member you want to edit.
- In the dropdown that appears, click 'Disable member access'.
- In the modal that opens, click 'Yes, disable member access'.
How to enable member access:
- Go to Account Settings > Workspace Settings > Teams > Members tab.
- Click the three dots icon on the row of the member you want to edit.
- In the dropdown that appears, click 'Enable member access'.
- In the modal that opens, click 'Yes, enable member access'
4. How to join a team
After being added to a team, the invited member will receive an email:
- Open the email titled “You have been invited to join [Company Name] Team.”
- Click the Join Team button.
- Set your password and click Create your account.
- You’re now ready to join your team
5. Create a custom role
Note: only members with the Owner role or members who have Full actions permission for Workspace and General Settings > Teams, can create a custom role.
- Go to Workspace Settings > Teams > Roles tab
- Click the ‘Create custom role’ button on the right
- In the modal that opens, fill in the Role name and Role description,
- Select the permissions you want to assign to the new role:
-
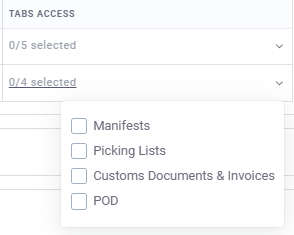
Shipping: can access the entire Shipping section, or only the Orders section, or only the My Documents section
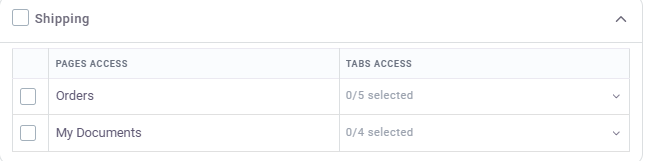
For both sections you can give access to one or more views: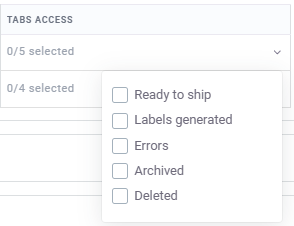
-
Tracking: can access the entire Tracking section
-
Returns: can access the entire Returns section
-
Checkout: can access the entire Checkout section
- Automation: can access the entire Automation section
- Notifications: can access the entire Notifications section
-
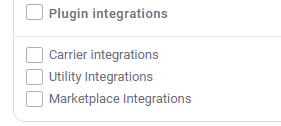
Integrations: can access the Marketplace/Store, Carrier or Utility section
-
-
-
Administration: can access to all pages with full permissions, as well as to all workspace and general settings (include full permission for managing subscriptions, Teams members and roles) and API section.
-
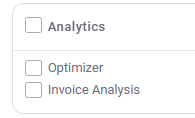
Analytics: can access the entire Data section or only Optimizer or only Invoice Analysis
- Workspace settings (read-only) and Product settings (edit permissions): can access Workspace settings (view-only, no editing allowed) and Product settings
-
- Click ‘Save’ to create the role
6. Edit/Delete a custom role
Note: only members with the Owner role or members who have Full actions permission for Workspace and General Settings > Teams, can edit/delete a custom role.
How to edit a custom role:
- Go to Workspace Settings > Teams > Roles tab
- Click the three dots icon on the row of the role you want to edit
- In the dropdown that appears, click ‘Edit’
- In the modal that opens, update the information as needed
- Click ‘Save’ to apply the changes
- Go to Workspace Settings > Teams > Roles tab
- Click the three dots icon on the row of the role you want to delete
- In the dropdown that appears, click ‘Delete’
- In the confirmation modal, click ‘Yes, delete it’ to confirm
How to edit a custom role:
- Go to Workspace Settings > Teams > Roles tab
- Click the three dots icon on the row of the role you want to edit
- In the dropdown that appears, click ‘Edit’
- In the modal that opens, update the information as needed
- Click ‘Save’ to apply the changes
How to delete a custom role (Note: You can delete a role only if no members are assigned to it)
- Go to Workspace Settings > Teams > Roles tab
- Click the three dots icon on the row of the role you want to delete
- In the dropdown that appears, click ‘Delete’
- In the confirmation modal, click ‘Yes, delete it’ to confirm
7. FAQs
I sent an invitation to a new member, but they're requested to create a new ShippyPro account. They already have an active account.
In this case, follow these steps:
-
The Owner sends the invitation (valid for 1 day).
-
The new member must be logged into the website.
-
The new member clicks on the email link.
-
The new member is directed to the 'Enter team' page.
-
The new member clicks the final button to enter the team.
-
Once logged in, the new member sees "This is your team profile" and the Owner's email.
Why do I see the error “An error occurred while inviting the member. Please try again. Request failed with status code 403” when trying to add a new member to Teams?
If you encounter this error message, please check whether you have exceeded the maximum number of users allowed in your Teams account.
With the Basic plan, you can have up to 3 different users. If you need to add more users, you will need to request a quotation from the Sales department.
Can I restrict users so they only see labels and deliveries for a specific marketplace, brand, or carrier connection in the same ShippyPro account?
No. Teams can restrict access to specific areas of the platform, but they cannot currently limit visibility to a specific marketplace, brand, or carrier connection within the same account. If you need that level of separation, the recommended options are to use separate accounts for each brand/marketplace or evaluate a multi-account setup, where an admin account manages carrier connections and assigns them to sub-accounts.