Let's see how you can connect Correos Express to ShippyPro in just few steps.
(This demo is only available in Spanish)
Summary:
1. Before you start
To connect Correos Express, first, ask your Correos Person to activate your API Credentials.
2. Connection steps
Click on Carriers > Correos Express Logo to start your connection.
-
Write down your Username (starts with a W plus 9 numbers and 3 letters. Example: W123456789ABC) and Password.
-
You’ll have to insert the Account Number (it has 9 digits and always ends in 0001).
- Select the Sender Address which is the static sender address for all shipments.
It must be located in Spain. You can easily add it in My Addresses page and it will appear in the dropdown menu.
-
Continue by selecting one of the services from the dropdown menu.
⚠️ If you don't have an IBAN, fill the field with a "-", don't leave it empty or the connection will result in error.
3. Additional Option
Besides your credentials, you'll also see some further options, let's take a look at them!
-
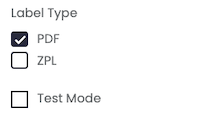
Label Type gives you the possibility you to choose the correct label format for your printer.
- The Account Country indicates the country specified in your Correos Express contract.
-
The Test Mode option should be flagged only if you have test credentials, not production credentials!
- If you want, enter a Custom Label to recognize the connection among all the others.
By filling Company name field from My Profile > Sender Info, the Carrier will show this info as Sender Name.
4. Troubleshooting & Errors
DESTINATARIO: CP NO ENCONTRADO
CP means "codigo postal" which means that the zip code is not valid or wrong. So check if the zip code and/or the city are correct.
Telefono Remitente No Valido
Ensure that the sender's phone number entered in either the Info Sender in the Profile settings section or the Hardcoded Sender section in the Carrier Connection is saved without any prefix.
To check: El Centro NO tiene contratado el Producto Solicitado
- Make sure the recipient's ZIP code is correct
-
If the error persists, contact your referent to know which service will be needed for the shipment