PrintNode is a fast cloud printing service that supports all printers.
Using PrintNode will allow you to print your shipping labels as soon as you generate them.
You can also set several printers and assign a printer for each carrier connected.
There is also the possibility to connect a USB scale to weight your parcels simultaneously, not to mention barcode scanning!
Let's see how it works!
Summary:
1. Before you start
Here you can create PrintNode account to start. First 50 prints are free, then check their Pricing for more details.
You should now install PrintNode app from Download section and keep it opened on all your devices.
2. Connection steps
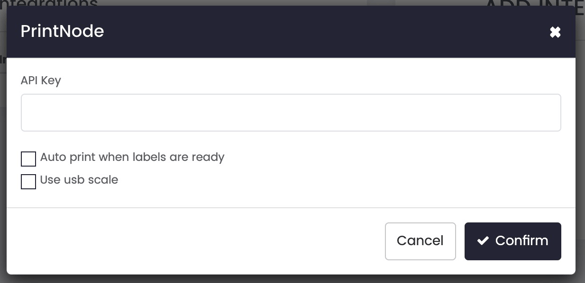
Once you signed up to PrintNode and installed the app, you can connect your account on ShippyPro from Integrations > Plugin > click on PrintNode logo.
You'll then need to create an API Key inside your PrintNode Account.
Once created, copy and paste it inside the pop up.
You can then choose to add some additional options like 'Auto print when labels are ready' or 'Use usb scale'. Click on Confirm to connect PrintNode.
3. Select the printers
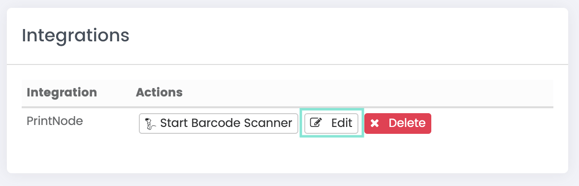
After you've correctly connected your PrintNode account, click on Edit to add printing preferences:
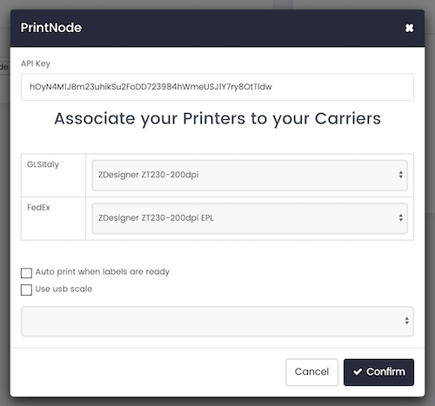
Here you can choose a different printer for each carrier connected on your ShippyPro profile. Click on Confirm to save printing preferences.
From Orders > Labels generated, you can now select in bulk orders and click on Print > Print on PrintNode and test the connection.
Or you can just click on the violet icon under Documentation to print one single label.
Note: Modifying an order (even with the API call Edit) will not trigger a reprint, even if a new label is generated.
Note: If you need to add more than 100 printers to your PrintNode account, please open a ticket for our Support team, which will provide further assistance.
4. Additional options
As mentioned, PrintNode allows you to scan a barcode from Invoices / Order Summary or Picking lists, you only need a common scanner to start! 🙌
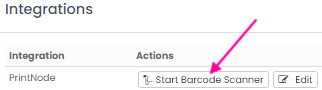
First of all, connect Printnode from Integrations > Plugins page following the instructions above.
Once connected you should then be able to display Start barcode scanner:
Click on Order ID and Please focus your cursor here.
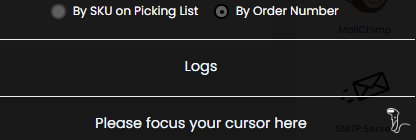
then scan the barcode and the label will be printed out.
Please note that you should bulk ship all orders first and only after create a Picking list from Shipping labels page.
This way you'll have a list of items per order and the barcode to scan on the right side.
Please note that the barcode will be displayed as following:
-
In case Order Summary / Invoice has been created from To Ship section -> Marketplace ID
-
In case Order Summary / Invoice has been created from Shipping Labels section -> ShippyPro ID
5. PrintOrder API
In order to use the "PrintOrder" API method, you must have an integration with PrintNode first. Check our API Documentation for more details about this API call.
6. Troubleshooting & Errors
I don’t see the printer selection in the drop-down menu
In case you don’t see the printer selection in the drop-down menu, check from your Printnode account whether they are present, from the section “Devices“.
In case they’re missing, contact Printnode support, or try to reinstall the Printnode Client Software: Cloud printing & remote printing for web applications