
Connect your Colissimo account to ShippyPro requires only a few steps!
-Apr-15-2024-08-50-06-0364-AM.gif)
Summary:
1. Connection steps
To connect Colissimo you can enter your Colissimo credentials from Carriers > Colissimo Logo.
In case of doubts, check if you can login from this page: these credentials should be used for our connection as well.
Select then your Label Type between:
A4 PDF
A6 PDF
ZPL
Horizontal A4 PDF with packing slip
Horizontal A4 PDF
DPL
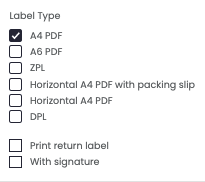
Click on Print Return label if you'd like to print Return Labels together with Shipment Label and on With Signature to enable signature at the delivery to be transmitted.
2. Additional Options
-
Colissimo Tracking
In order to be able to show Colissimo Tracking you need to enable it directly from your Colissimo Back Office.
Let's see step by step how to proceed!
First you need to log in to your Colissimo Back Office, you'll find the direct link here.
Access to Applications section on the top of the page.
-Apr-15-2024-08-50-09-2157-AM.gif)
Then scroll down to Web Service de Suivi.
At this point it will be asked to read the Terms & Conditions, read them and then tick the option right below.
-4.gif)
Once done, Confirm.
You'll be now able to show Tracking Codes for your Shipments with Colissimo.
Colissimo needs shipment cost filled for International shipments, discover here how to do it.
3. Troubleshooting & Errors
Go to this link to check common errors and resolutions:
If you're not able to click on Edit button in your Colissimo connection this is due to privacy reasons. Your credentials belong to Asendia and can't be edited.
As a workaround, you can disconnect and reconnect the courier by entering the new parameters.