Let's see how to connect Mercitalia to ShippyPro in a few steps.
-Apr-15-2024-09-04-16-0843-AM.gif)
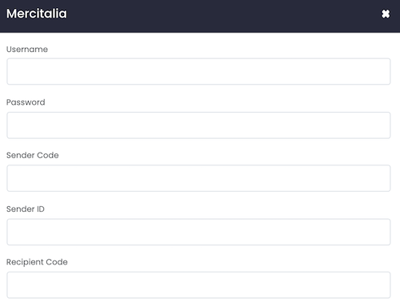
1. Before you start
Ask Mercitalia for the following data:
Username
Password
Sender Code
Sender ID
Recipient Code
2. Connection steps
Then copy and paste the information received into your ShippyPro account from Carrier section by clicking on Mercitalia logo:
Then select the Label Type (PDF A6) and the Service Type between:
-
FAST > E500
-
TNI > E400
Set up Email Notifications to keep your customers updated.
Enable Test mode to create some test labels.
If you want, you can also enter a Custom Label to recognise the connection among all others.
Remember to select the Comepickup date Carrier Option to generate your labels correctly.