Learn how to create a Picking List in a few clicks
Creating Shipping Documents with the New Experience is really easy. With just a few clicks, you'll be able to create a Picking List, for example.
This document is really useful to prepare your shipments and fulfill your customers' orders quickly. Generally, a picking list shows order details, SKUs, recipient address, items description and price.
Let's see how to create it step by step! 🔍
4. Where can I find my Picking Lists?
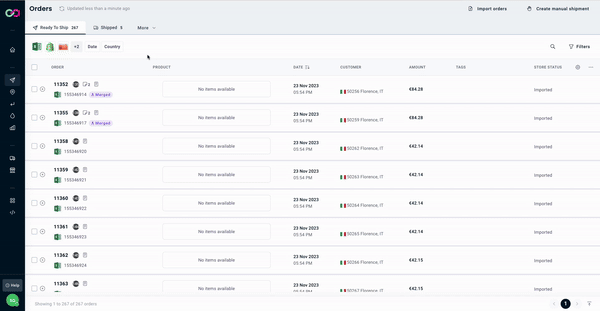
1. Select your Shipments
In the views Ready to Ship or Shipped, select only the shipments you'd like to include inside the Picking List.
-1.gif)
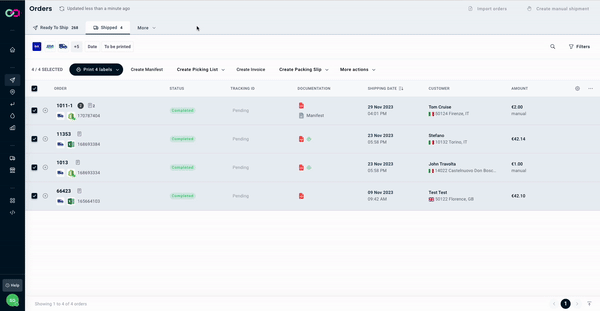
2. Create the Picking List 📄
Once the orders are selected, under the filters you will have all the available actions for those orders.
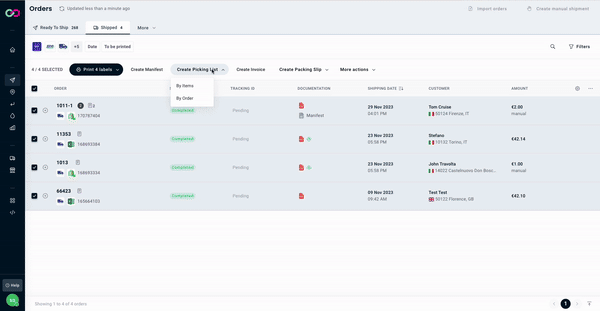
Select Create Picking List and choose the type of picking list you prefer:
-
By order: if you want the list to group items by order;
-
By items: if you prefer a list with all the items of the selected orders, grouped by quantity and sku.
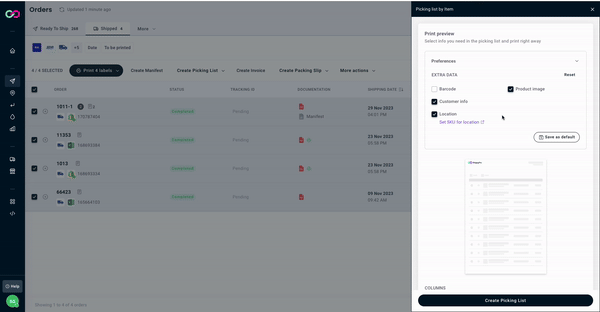
3. Select the Preferences ⚙️
Once you have selected the type of the Picking List, you will have the opportunity to modify the preferences in order to create a document that fully meets your needs.
Specifically you will be able to select whether to add:
-
Barcode: to speed up picking activities;
-
Notes: if included in the orders;
-
Images: of the products themselves
-
Customer information
-
Location: that is, the location of the item in the warehouse (if set from here)
In addition, before creating your document, you can also edit the latest details of the orders you have decided to print.
In this case for each order you can vary the main information of the items:
-
Description
-
Quantity
-
Value
-
SKU, EAN and ASIN
4. Where can I find my Picking Lists? 👀
Once created, your documents will be directly accessible from the order table.
-
Ready to Ship: you will find the information of the documents created directly in the order line, next to the ID#;
-
Shipped: a dedicated column will give you direct access to your created documents.