
Here's how to edit your Return Email Templates
With ShippyPro, your customers will never miss a shipment update! Not even when they return items!
Once the return request is approved, ShippyPro sends the return label of your carriers by mail with return instructions.
And there's more! You'll already find some ready to send templates that you can fully customize!
Let's see how you can customize your Email Templates!
Summary:
1. How it works
3. How to customize your Return Emails
1. How it works
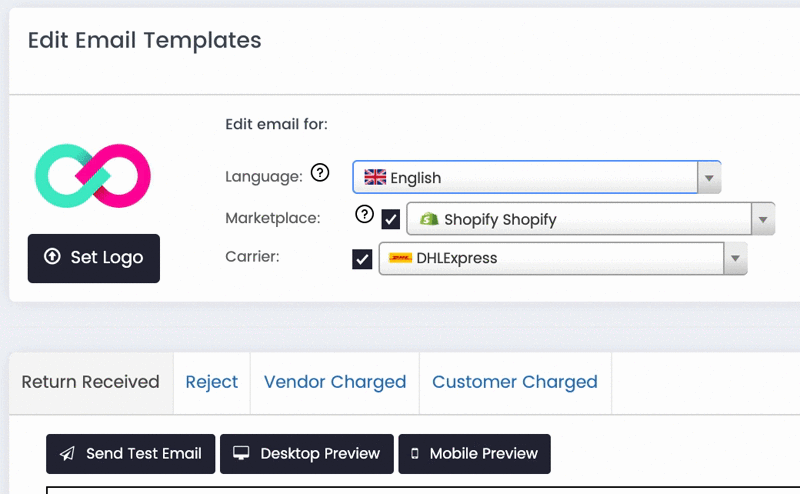
From Easy Return > Email Templates, you can edit and customize the emails that are automatically sent to your customers. You can add your logo, your banner and edit the content of the email.
According to your return form settings, they'll receive a confirmation or a rejection email.
-
ShippyPro provides already translated Email Templates in 8 languages that will be sent according to the Country of Destination. You can also customize your Email Templates per Language, Marketplace and Carrier.
-
There are predefined templates for German, English, Spanish, French, Italian, Polish, Portuguese and Dutch.
2. Return Email Conditions
According to the settings of your Return Rules, your customers will receive customized return emails.
-
Return Received: This email will be sent to your customers if the return is approved manually. It will in fact tell your customers that the request has been received.
-
Reject: This email will be sent only if the return request is rejected from you.
-
Vendor Charged: This email will be sent if the return request is accepted and the vendor pays for the shipment.
-
Customer Charged: This email will be sent if the return is accepted and the customer will pay for the return shipment.
Once the return request is approved, ShippyPro sends the return label of your carriers by mail with return instructions!
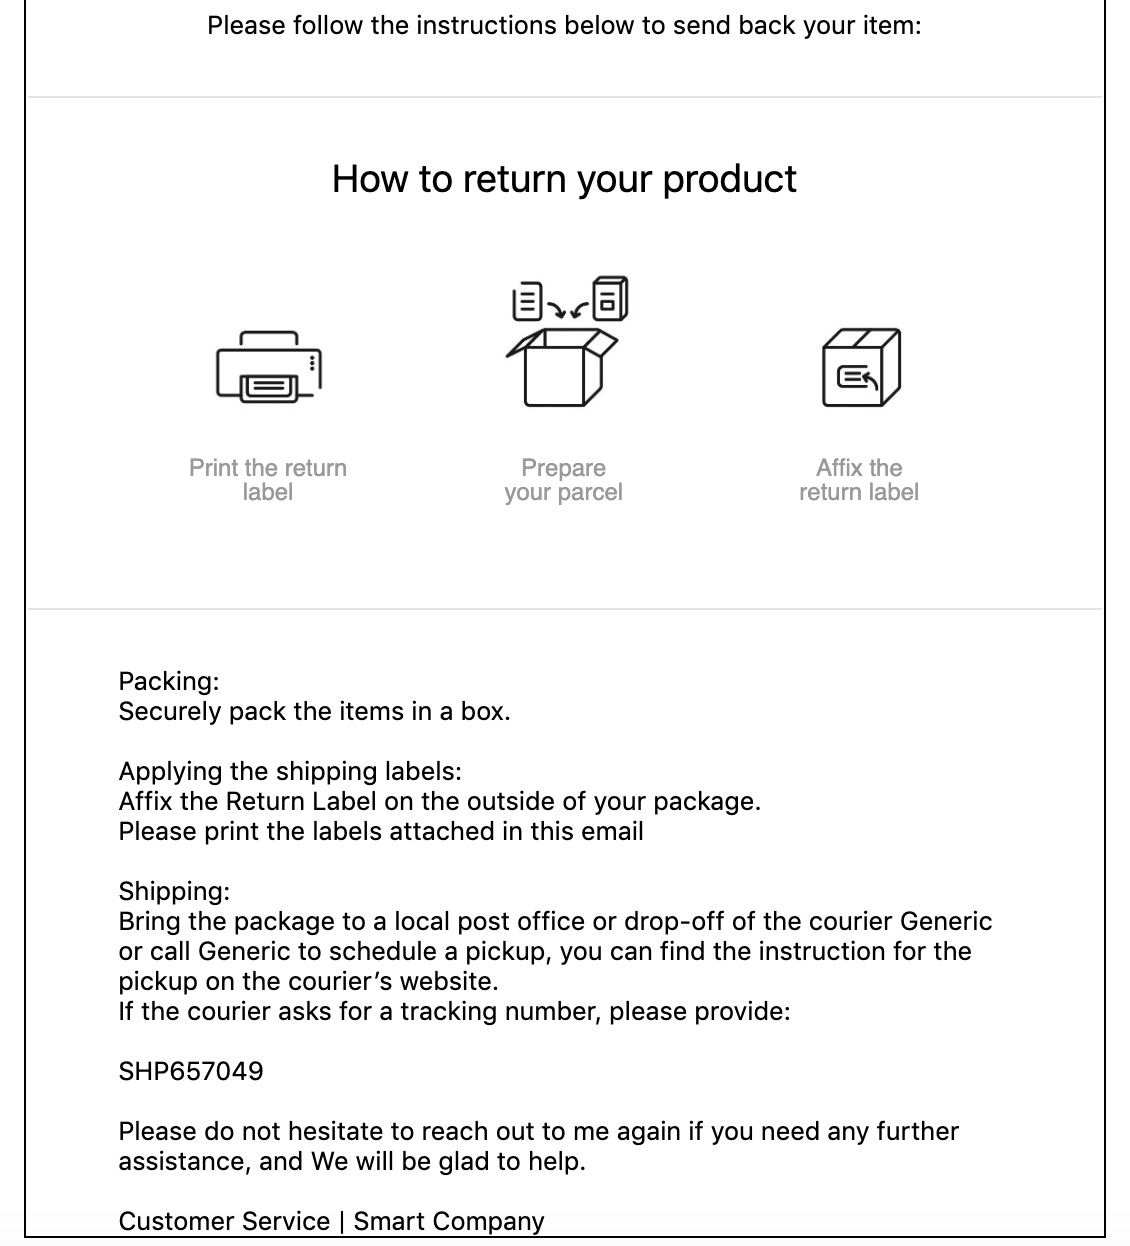
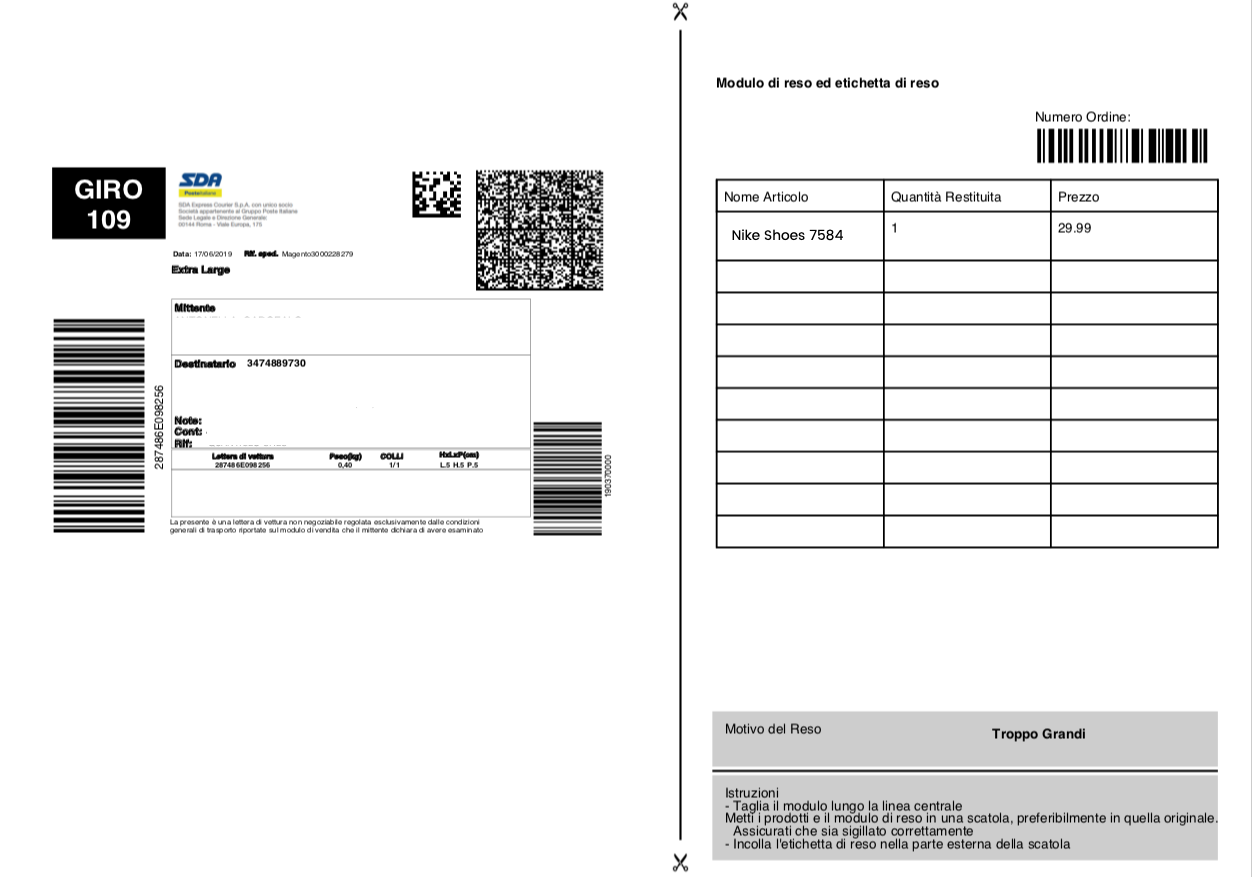
Your customer can print the shipping labels in one click. He'll be instantly informed on how to pack the return, where to put the return label and what to include in the return form.
The customer only needs to cut the shipping label and put the Return Form directly inside the package. Here's an example:
3. How to customize your Return Emails
Sender Name
The sender name of return emails can be modified directly on your email server's setup. ShippyPro will display the from_name column as the default sender, so please make sure you update it according to your preferences.
Content
This email, as well as Reject, will only be sent to your customers if the return is approved manually.
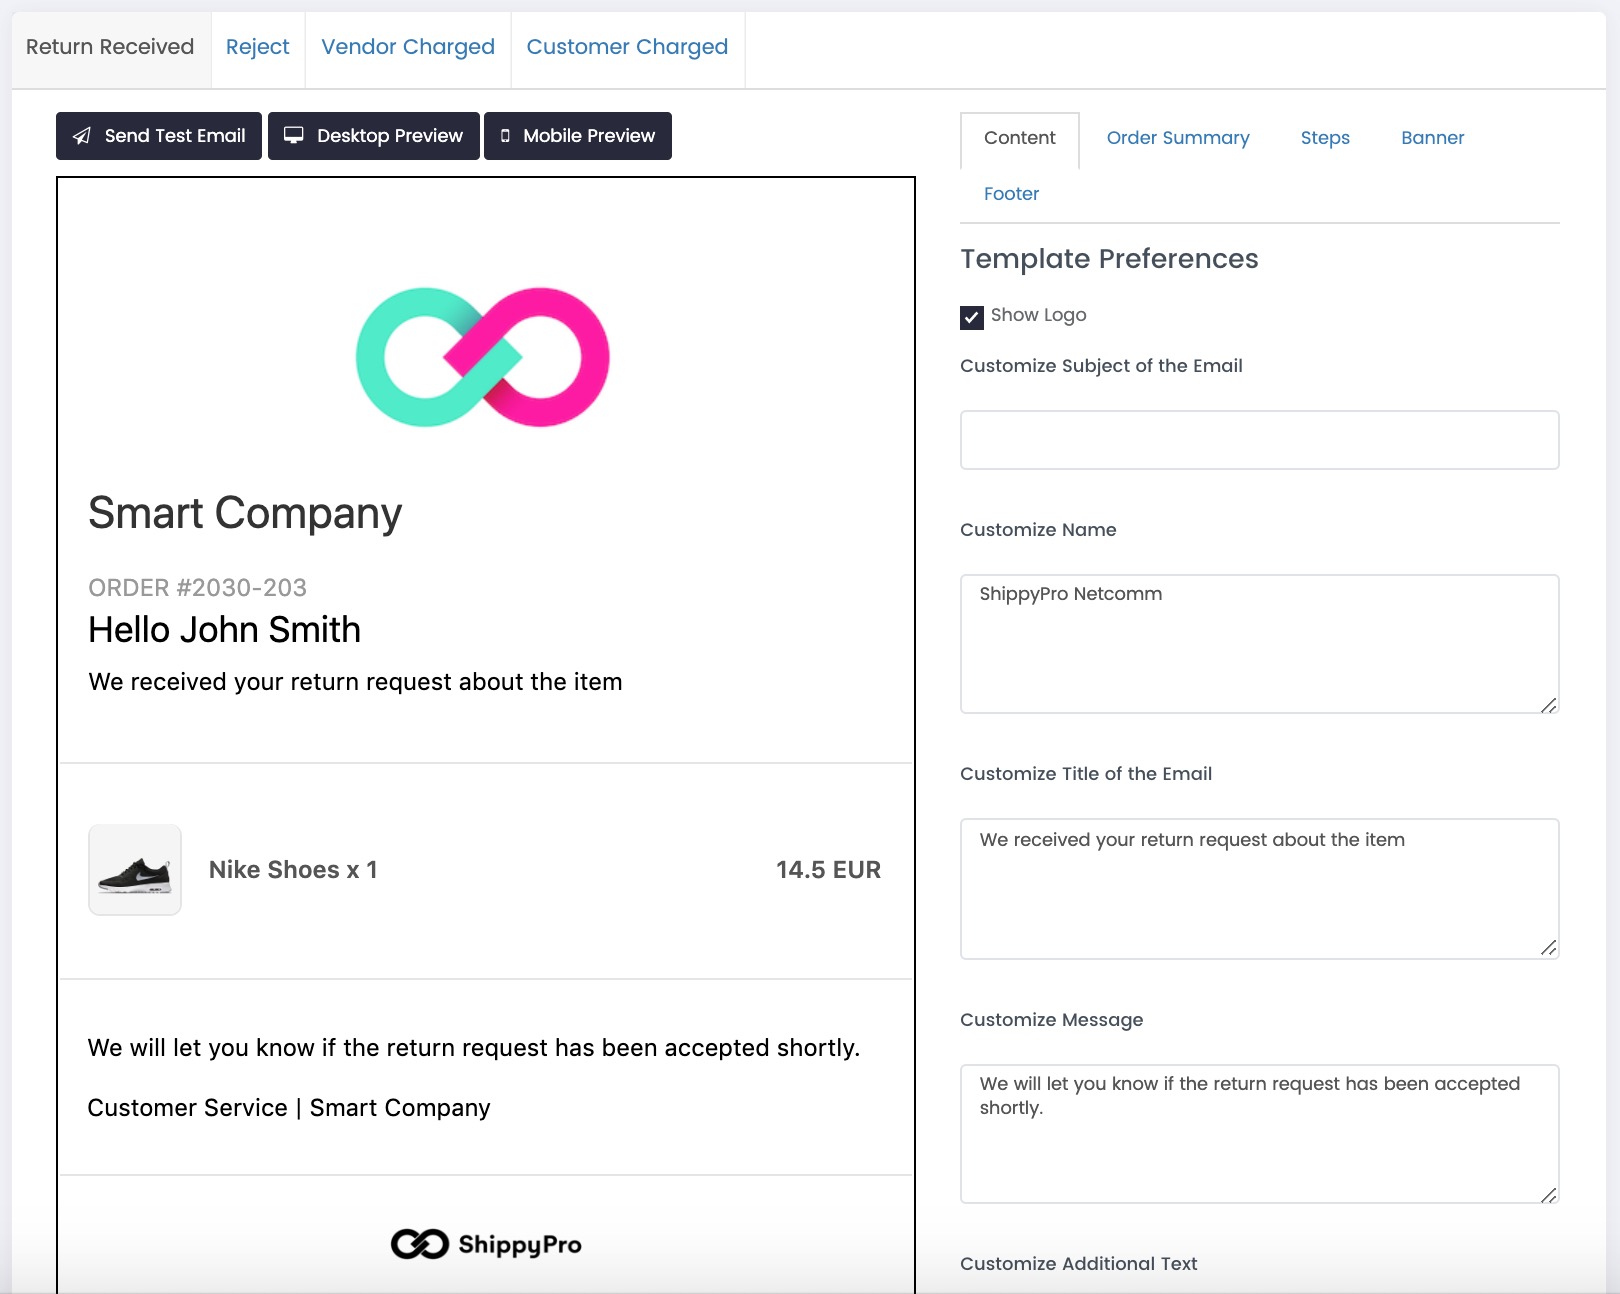
It will in fact tell your customers that the request has been received.
You can of course add your logo, customize the content of your email, as well as the subject, the title, your name and add some additional text.
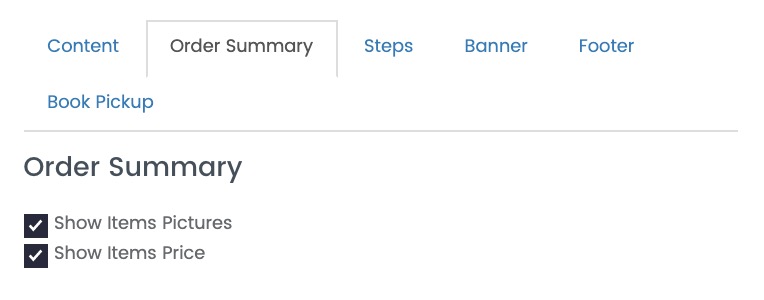
Order Summary
From Order Summary, you can decide to show the items pictures and the items price.
Steps
For Vendor Charged and Customer Charged template, ShippyPro will automatically include the instructions for packing the return and shipping it correctly.
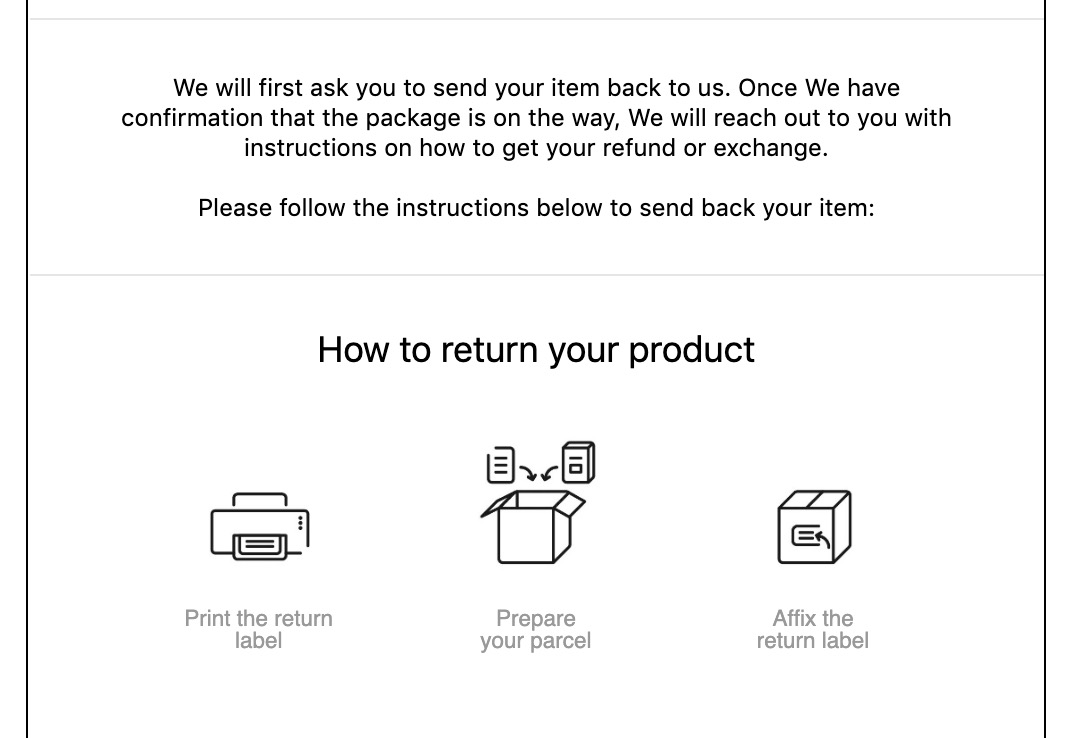
However, you can also edit these steps, customizing the images and the content:
-2.jpg)
Banner
Here you can create and include a customized banner in three easy steps. Simply add the banner link, the text and the image address:
-1.png)
Footer
You can also link your Social Networks inside the footer. Try and connect your Facebook, Twitter, LinkedIn, Instagram, Google Plus or your Pinterest account.
-1.gif)
You just need to paste your homepage url and some content if you'd like.
Here's how the footer will look like:

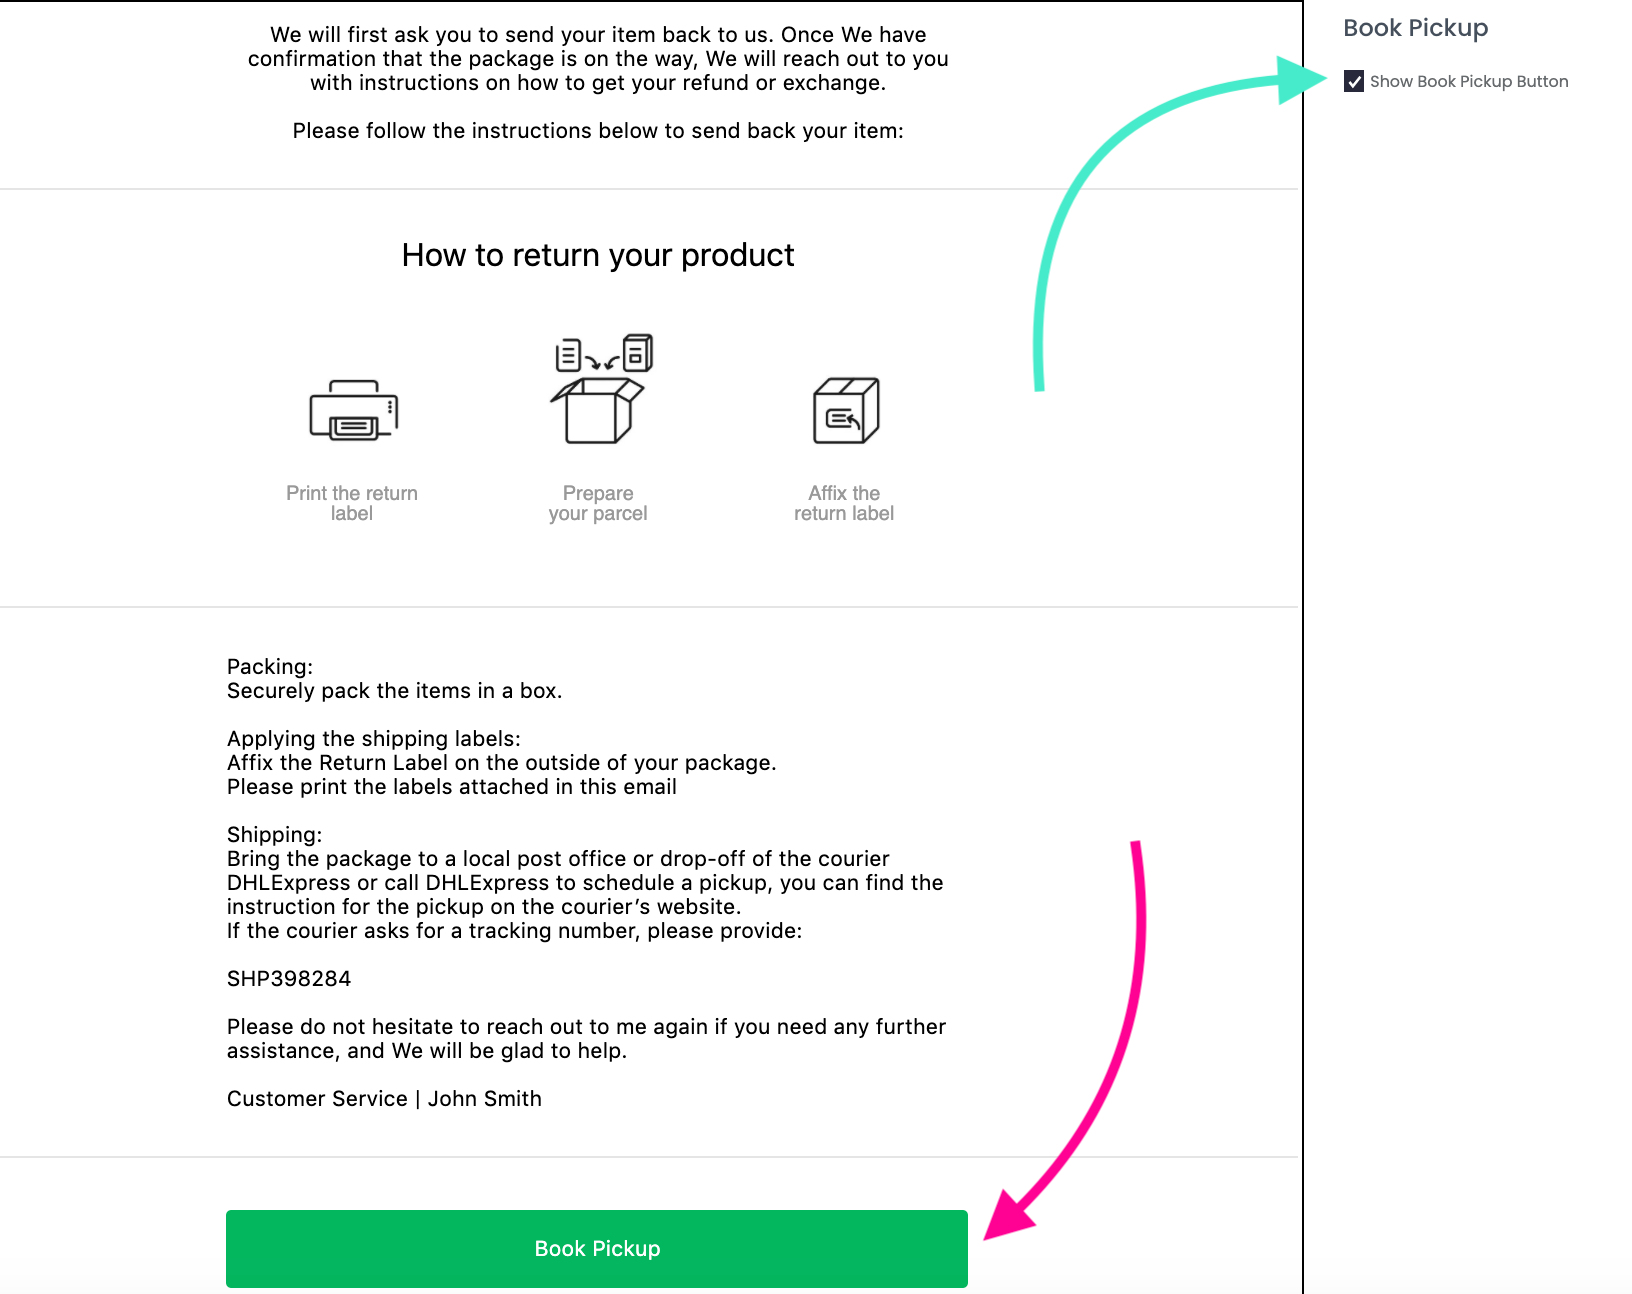
Book a Pickup
You can also include a button at the end of the email to make it easier for your customers to book a pickup for their return.
You can enable it by clicking on the option shown below from Vendor Charged > Book Pickup:
They'll be redirected to a new browser tab with all the information your customers need to book a pickup:
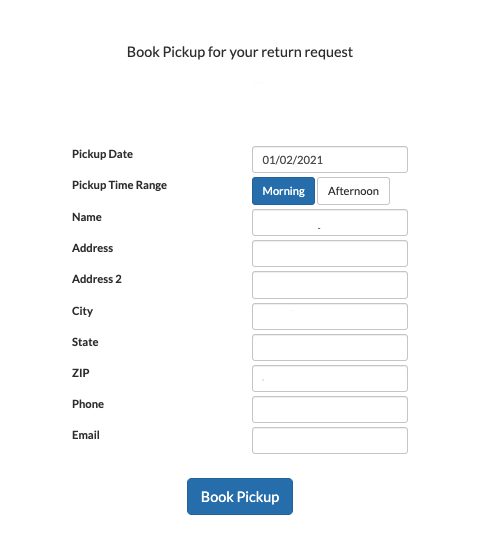
The Book Pickup is available for the carriers who support both return labels and pickup booking. Go on our Carriers map to check the list, below an example:
-1.png?width=688&height=92&name=image%20(2)-1.png)
Remember to apply this change for all the languages you're going to ship.